端到端工作流程:驱动开发
本指南演示了使用 MLflow 的驱动开发方法构建和评估 GenAI 应用程序的完整工作流程。
Databricks 用户:要将评估数据集与 Databricks Unity Catalog 结合使用,MLflow 需要额外安装 databricks-agents 包。此包使用 Unity Catalog 来存储数据集。使用以下命令进行安装:pip install databricks-agents
评估数据集需要一个具有SQL 后端(PostgreSQL, MySQL, SQLite, 或 MSSQL)的 MLflow 跟踪服务器。此功能与 FileStore(基于本地文件系统的跟踪)不兼容。
先决条件
pip install --upgrade mlflow>=3.4 openai
步骤 1:构建和跟踪您的应用程序
从一个已跟踪的 GenAI 应用程序开始。本示例展示了一个客户支持机器人,但此模式适用于任何 LLM 应用程序。您可以使用 mlflow.trace 装饰器进行手动检测,或者如以下所示启用 OpenAI 的自动跟踪。
import mlflow
import openai
import os

# Configure environment
os.environ["OPENAI_API_KEY"] = "your-api-key-here"
mlflow.set_experiment("Customer Support Bot")

# Enable automatic tracing for OpenAI
mlflow.openai.autolog()


class CustomerSupportBot:
    def __init__(self):
        self.client = openai.OpenAI()
        self.knowledge_base = {
            "refund": "Full refunds within 30 days with receipt.",
            "shipping": "Standard: 5-7 days. Express available.",
            "warranty": "1-year manufacturer warranty included.",
        }

    @mlflow.trace
    def answer(self, question: str) -> str:
        # Retrieve relevant context
        context = self._get_context(question)

        # Generate response
        response = self.client.chat.completions.create(
            model="gpt-4o-mini",
            messages=[
                {"role": "system", "content": "You are a helpful support assistant."},
                {
                    "role": "user",
                    "content": f"Context: {context}\n\nQuestion: {question}",
                },
            ],
            temperature=0.3,
        )
        return response.choices[0].message.content

    def _get_context(self, question: str) -> str:
        # Simple keyword matching for demo
        for key, value in self.knowledge_base.items():
            if key in question.lower():
                return value
        return "General customer support information."


bot = CustomerSupportBot()
步骤 2:捕获生产跟踪
使用实际或测试场景运行您的应用程序以捕获跟踪。之后,您将使用 mlflow.search_traces() 来检索这些跟踪,以便进行注释和创建数据集。
# Test scenarios
test_questions = [
    "What is your refund policy?",
    "How long does shipping take?",
    "Is my product under warranty?",
    "Can I get express shipping?",
]

# Capture traces - automatically logged to the active experiment
for question in test_questions:
    response = bot.answer(question)
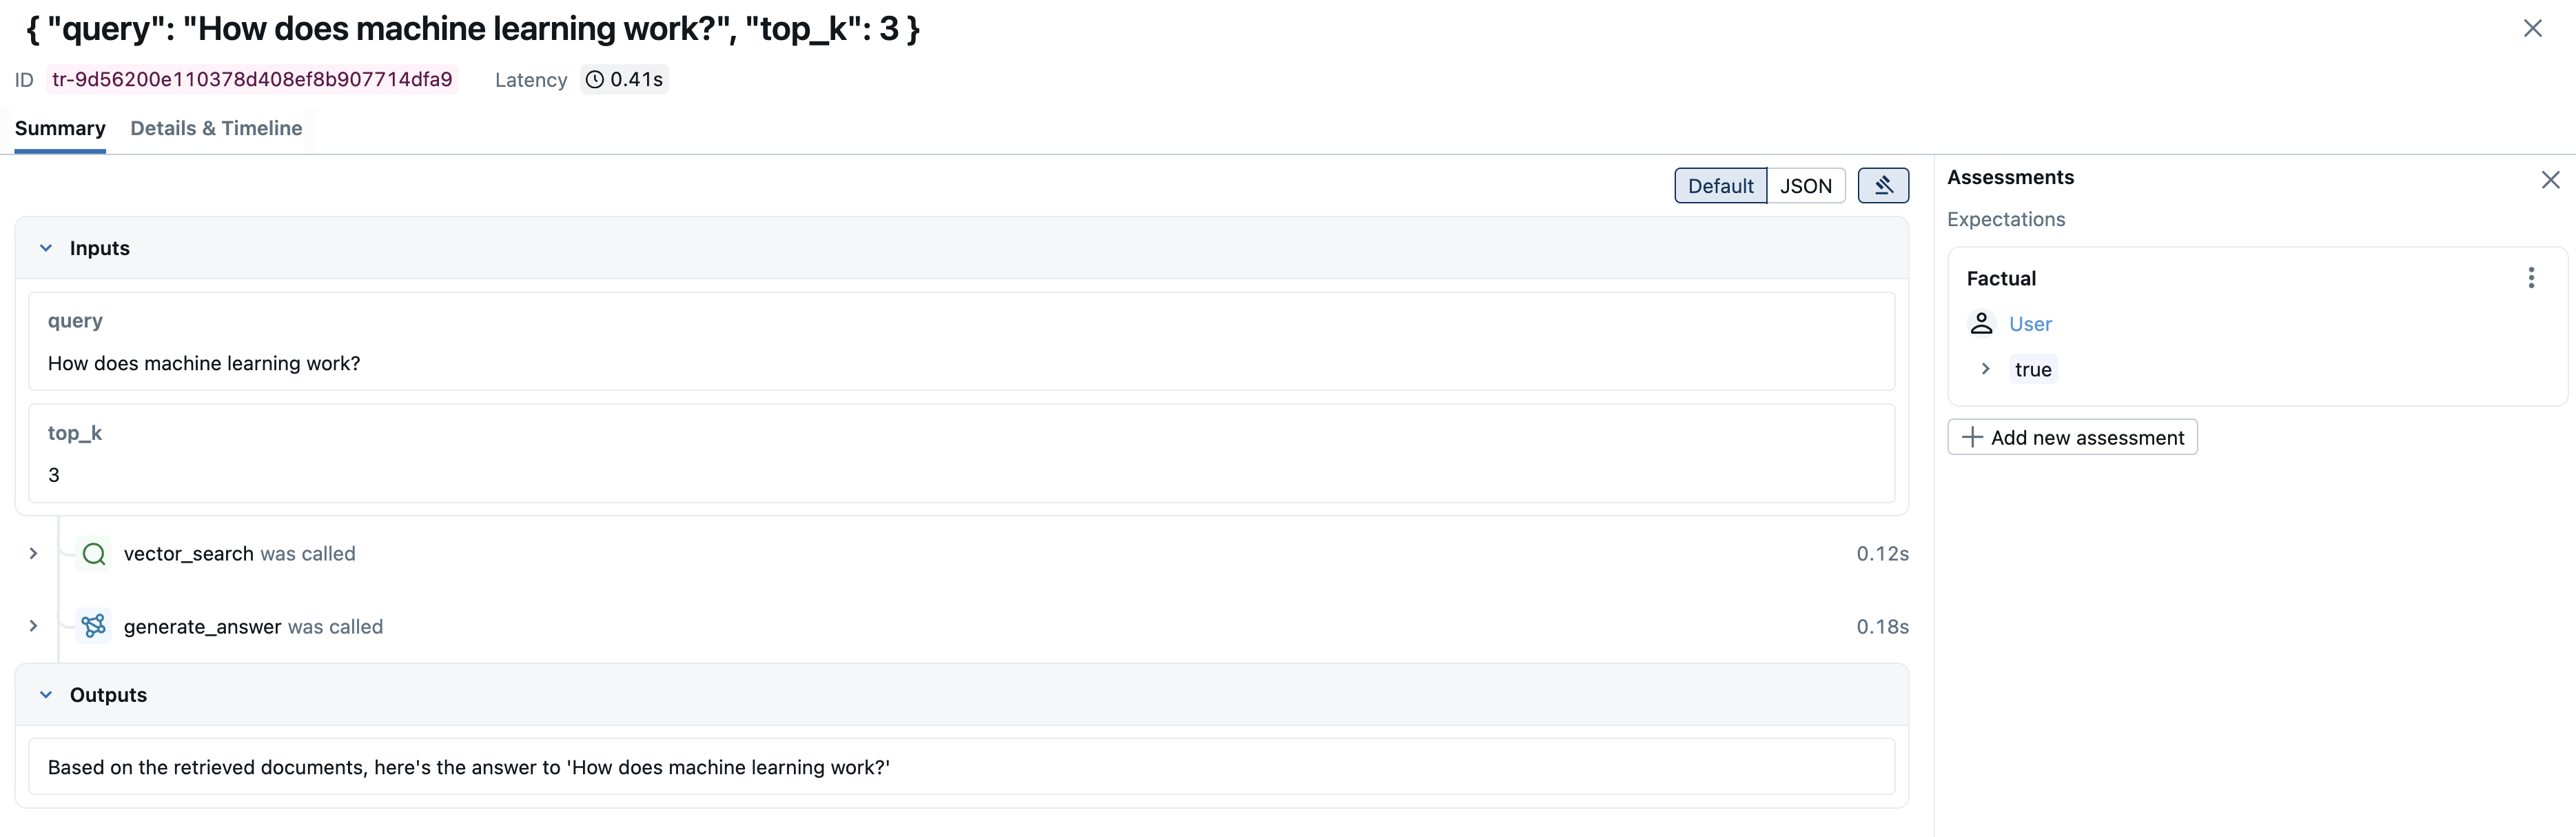
步骤 3:添加地面真实预期
向您的跟踪添加预期,以定义您期望从应用程序获得的响应。使用 mlflow.log_expectation() 来用将作为评估基线的地面真实值注释跟踪。您也可以直接在 UI 中应用预期。
# Search for recent traces (uses current active experiment by default)
traces = mlflow.search_traces(
    max_results=10, return_type="list"  # Return list of Trace objects for iteration
)

# Add expectations to specific traces
for trace in traces:
    # Get the question from the root span inputs
    root_span = trace.data._get_root_span()
    question = (
        root_span.inputs.get("question", "") if root_span and root_span.inputs else ""
    )

    if "refund" in question.lower():
        mlflow.log_expectation(
            trace_id=trace.info.trace_id,
            name="key_information",
            value={"must_mention": ["30 days", "receipt"], "tone": "helpful"},
        )
    elif "shipping" in question.lower():
        mlflow.log_expectation(
            trace_id=trace.info.trace_id,
            name="key_information",
            value={"must_mention": ["5-7 days"], "offers_express": True},
        )
步骤 4:创建评估数据集
将您的注释跟踪转换为可重用的评估数据集。使用 create_dataset() 来初始化您的数据集,并使用 merge_records() 添加来自多个源的测试用例。
from mlflow.genai.datasets import create_dataset

# Create dataset from current experiment
dataset = create_dataset(
    name="customer_support_qa_v1",
    experiment_id=mlflow.get_experiment_by_name("Customer Support Bot").experiment_id,
    tags={"stage": "validation", "domain": "customer_support"},
)

# Re-fetch traces to get the attached expectations
# The expectations are now part of the trace data
annotated_traces = mlflow.search_traces(
    max_results=100,
    return_type="list",  # Need list for merge_records
)

# Add traces to dataset
dataset.merge_records(annotated_traces)

# Optionally add manual test cases
manual_tests = [
    {
        "inputs": {"question": "Can I return an item after 45 days?"},
        "expectations": {"should_clarify": "30-day policy", "tone": "apologetic"},
    },
    {
        "inputs": {"question": "Do you ship internationally?"},
        "expectations": {"provides_alternatives": True},
    },
]
dataset.merge_records(manual_tests)
步骤 5:运行系统化评估
使用内置和自定义评估器来评估您的应用程序相对于数据集。使用 mlflow.genai.evaluate() 来运行全面的评估,包括像 Correctness 这样的评估器来进行事实准确性评估。您还可以使用 @scorer 装饰器创建自定义评估器,以评估特定领域的标准。
from mlflow.genai import evaluate
from mlflow.genai.scorers import Correctness, Guidelines, scorer


# Define custom scorer for your specific needs
@scorer
def contains_required_info(outputs: str, expectations: dict) -> float:
    """Check if response contains required information."""
    if "must_mention" not in expectations:
        return 1.0

    output_lower = outputs.lower()
    mentioned = [term for term in expectations["must_mention"] if term in output_lower]
    return len(mentioned) / len(expectations["must_mention"])


# Configure evaluation
scorers = [
    Correctness(name="factual_accuracy"),
    Guidelines(
        name="support_quality",
        guidelines="Response must be helpful, accurate, and professional",
    ),
    contains_required_info,
]

# Run evaluation
results = evaluate(
    data=dataset,
    predict_fn=bot.answer,
    scorers=scorers,
    model_id="customer-support-bot-v1",
)

# Access results
metrics = results.metrics
detailed_results = results.tables["eval_results_table"]
步骤 6:迭代和改进
使用评估结果来改进您的应用程序,然后使用相同的数据集重新评估。
# Analyze results
low_scores = detailed_results[detailed_results["factual_accuracy/score"] < 0.8]
if not low_scores.empty:
    # Identify patterns in failures
    failed_questions = low_scores["inputs.question"].tolist()

    # Example improvements based on failure analysis
    bot.knowledge_base[
        "refund"
    ] = "Full refunds available within 30 days with original receipt. Store credit offered after 30 days."
    bot.client.temperature = 0.2  # Reduce temperature for more consistent responses

    # Re-evaluate with same dataset for comparison
    improved_results = evaluate(
        data=dataset,
        predict_fn=bot.answer,  # Updated bot
        scorers=scorers,
        model_id="customer-support-bot-v2",
    )

    # Compare versions
    improvement = (
        improved_results.metrics["factual_accuracy/score"]
        - metrics["factual_accuracy/score"]
    )