使用模型记录提示
Prompt 通常用作 GenAI 应用程序的一部分。管理 Prompt 和模型之间的关联对于跟踪模型的演变和确保不同环境之间的一致性至关重要。MLflow Prompt Registry 与 MLflow 的模型跟踪功能集成,允许您跟踪模型和应用程序使用的 Prompt(及版本)。
基本用法
要记录带有相关 Prompt 的模型,请在 log_model 方法中使用 prompts 参数。prompts 参数接受与模型相关的 Prompt URL 或 Prompt 对象的列表。关联的 Prompt 将显示在 MLflow UI 的模型运行中。
import mlflow

with mlflow.start_run():
    mlflow.<flavor>.log_model(
        model,
        ...
        # Specify a list of prompt URLs or prompt objects.
        prompts=["prompts:/summarization-prompt/2"]
    )
用于将 Prompt 与模型关联的 prompts 参数仅支持 GenAI flavor,例如 OpenAI、LangChain、LlamaIndex、DSPy 等。请参阅 GenAI flavors 获取支持的 flavor 的完整列表。
示例 1:使用 LangChain 记录 Prompt
1. 创建 Prompt
如果您尚未创建 Prompt,请按照本页的说明创建新 Prompt。
2. 使用已注册的 Prompt 定义 Chain
from langchain_core.prompts import ChatPromptTemplate
from langchain_openai import ChatOpenAI

# Load registered prompt
prompt = mlflow.genai.load_prompt("prompts:/summarization-prompt/2")

# Create LangChain prompt object
langchain_prompt = ChatPromptTemplate.from_messages(
    [
        (
            # IMPORTANT: Convert prompt template from double to single curly braces format
            "system",
            prompt.to_single_brace_format(),
        ),
        ("placeholder", "{messages}"),
    ]
)

# Define the LangChain chain
llm = ChatOpenAI()
chain = langchain_prompt | llm

# Invoke the chain
response = chain.invoke({"num_sentences": 1, "sentences": "This is a test sentence."})
print(response)
3. 将 Chain 记录到 MLflow
然后将 Chain 记录到 MLflow 并使用 prompts 参数指定 Prompt URL。
with mlflow.start_run(run_name="summarizer-model"):
    mlflow.langchain.log_model(
        chain, name="model", prompts=["prompts:/summarization-prompt/2"]
    )
现在您可以在 MLflow UI 中查看与模型关联的 Prompt。
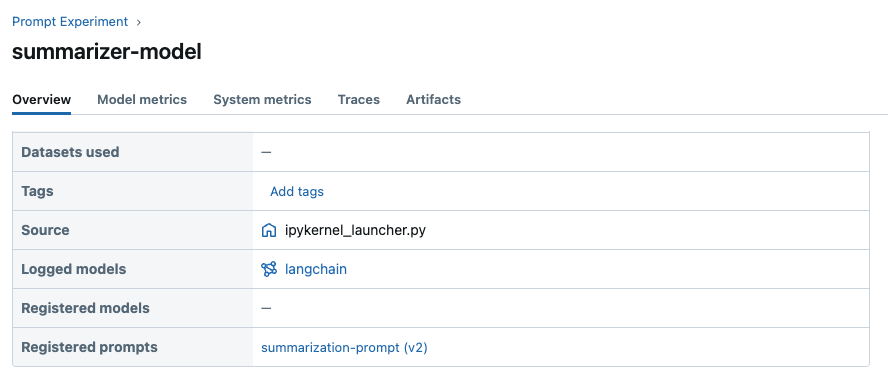
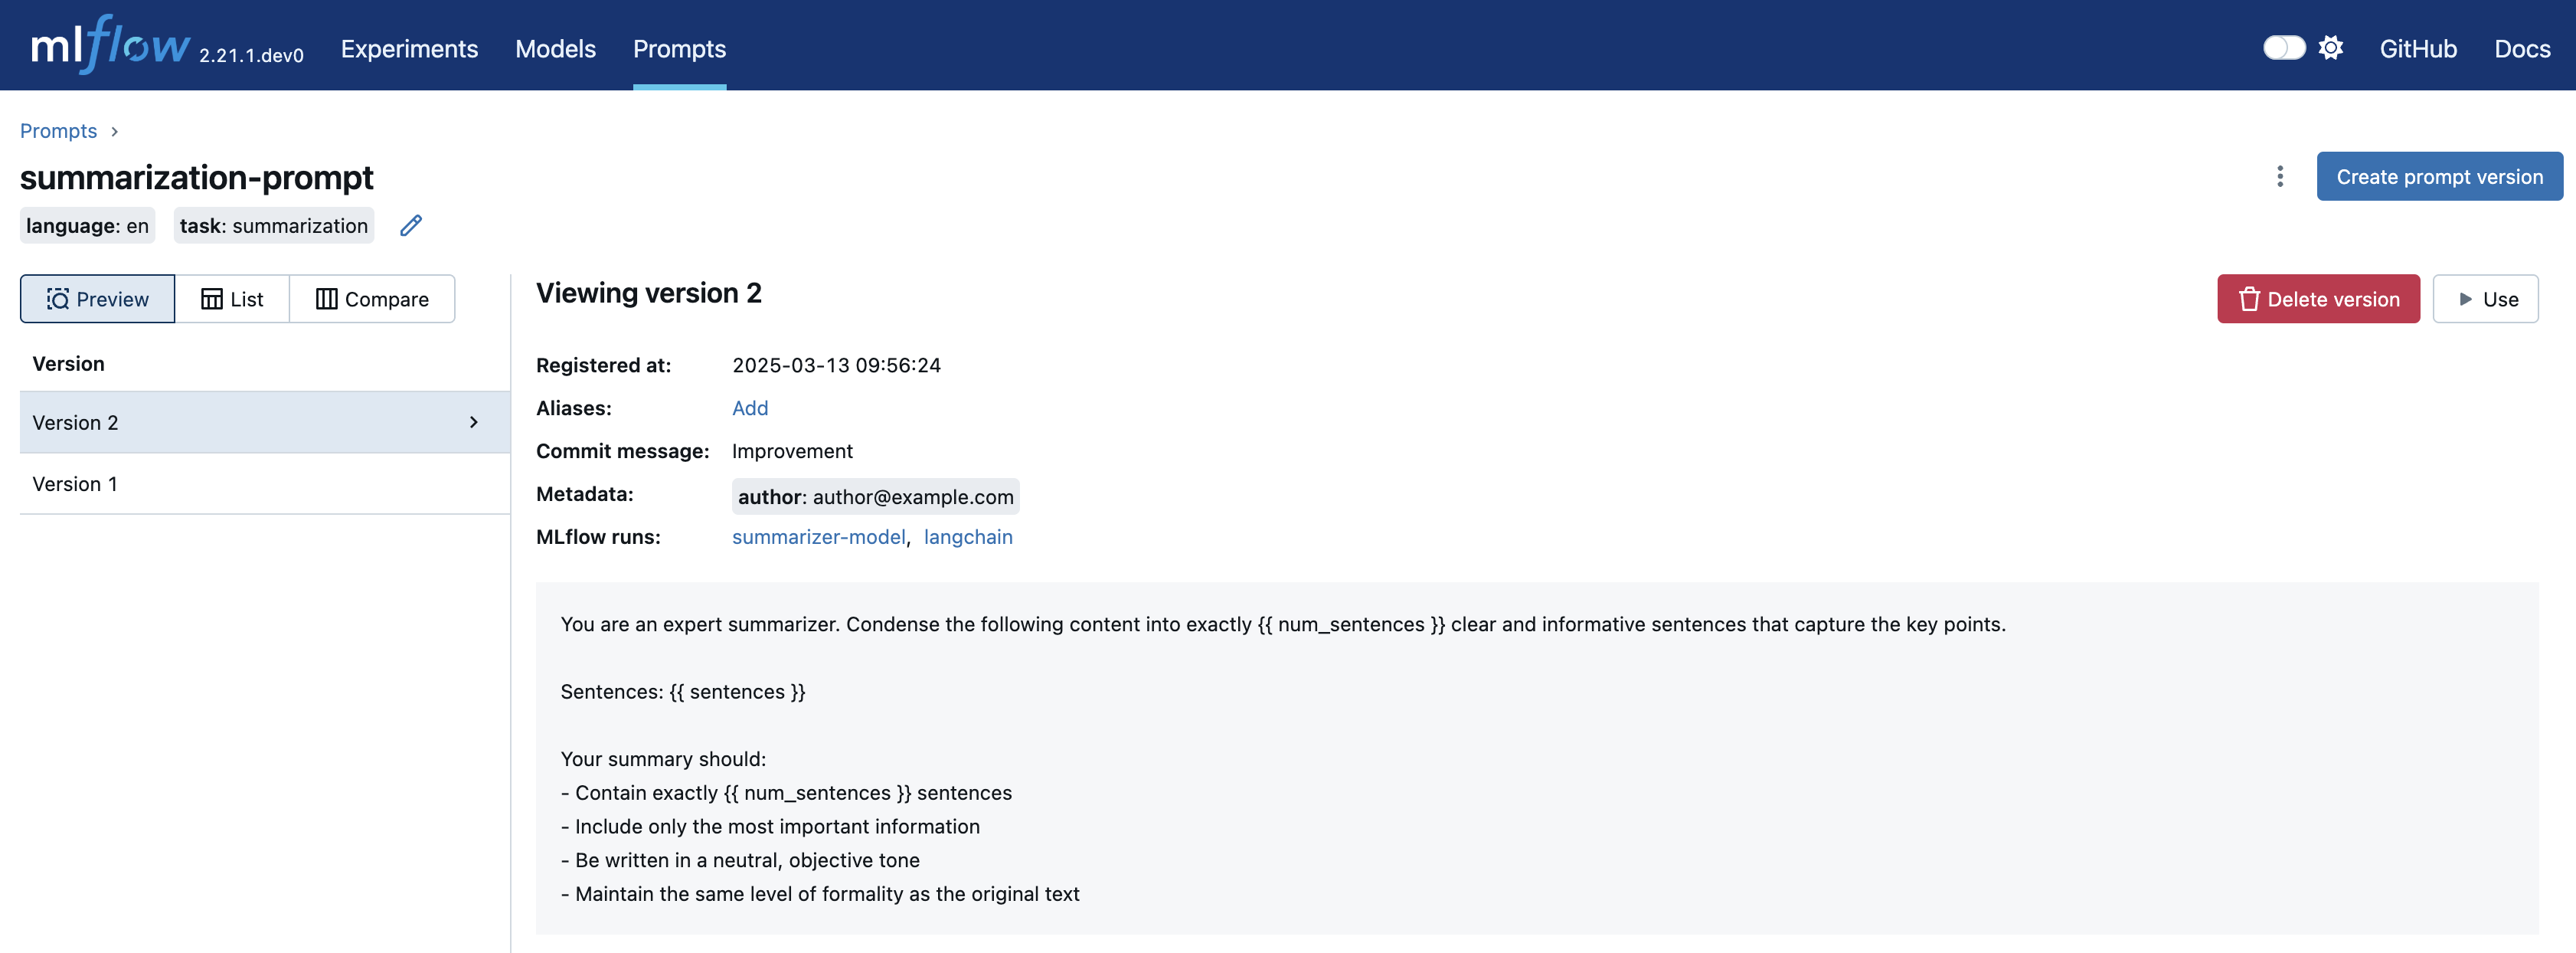
此外,您可以在 Prompt 详情页面中查看使用特定 Prompt 的模型(运行)列表。
示例 2:使用 Models-from-Code 自动记录 Prompt
Models-from-Code 允许您在代码中定义和记录模型的特性。使用代码记录模型带来多项好处,例如可移植性、可读性、避免序列化等。
结合 MLflow Prompt Registry,该特性解锁了管理 Prompt 版本更大的灵活性。值得注意的是,如果您的模型代码使用 MLflow Prompt Registry 中的 Prompt,MLflow 会为您自动将其与模型一起记录。
在下面的示例中,我们使用 LangGraph 来定义一个非常简单的聊天机器人,该机器人使用已注册的 Prompt。
1. 创建 Prompt
import mlflow

# Register a new prompt
prompt = mlflow.genai.register_prompt(
    name="chat-prompt",
    template="You are an expert in programming. Please answer the user's question about programming.",
)
2. 使用已注册的 Prompt 定义 Graph
创建一个名为 chatbot.py 的 Python 脚本,内容如下。
如果您正在使用 Jupyter notebook,可以取消注释 %writefile magic 命令,并在单元格中运行以下代码来生成脚本。
# %%writefile chatbot.py

import mlflow
from typing import Annotated
from typing_extensions import TypedDict

from langchain_openai import ChatOpenAI
from langgraph.graph import StateGraph, START, END
from langgraph.graph.message import add_messages


class State(TypedDict):
    messages: list


llm = ChatOpenAI(model="gpt-4o-mini", temperature=0.1)
system_prompt = mlflow.genai.load_prompt("prompts:/chat-prompt/1")


def add_system_message(state: State):
    return {
        "messages": [
            {
                "role": "system",
                "content": system_prompt.to_single_brace_format(),
            },
            *state["messages"],
        ]
    }


def chatbot(state: State):
    return {"messages": [llm.invoke(state["messages"])]}


graph_builder = StateGraph(State)
graph_builder.add_node("add_system_message", add_system_message)
graph_builder.add_node("chatbot", chatbot)
graph_builder.add_edge(START, "add_system_message")
graph_builder.add_edge("add_system_message", "chatbot")
graph_builder.add_edge("chatbot", END)

graph = graph_builder.compile()

mlflow.models.set_model(graph)
3. 将 Graph 记录到 MLflow
在 model 参数中指定脚本的文件路径。
with mlflow.start_run():
    model_info = mlflow.langchain.log_model(
        lc_model="./chatbot.py",
        name="graph",
    )
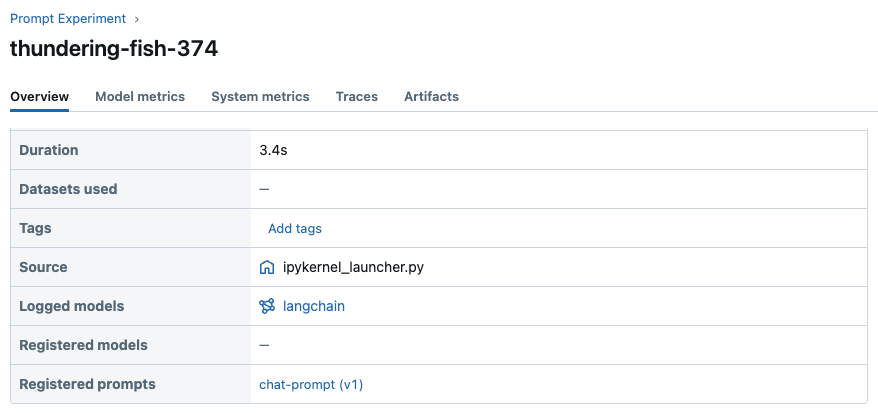
这次我们没有指定 prompts 参数,但 MLflow 会自动将脚本中加载的 Prompt 记录到已记录的模型中。现在您可以在 MLflow UI 中查看关联的 Prompt。
4. 加载 Graph 并调用
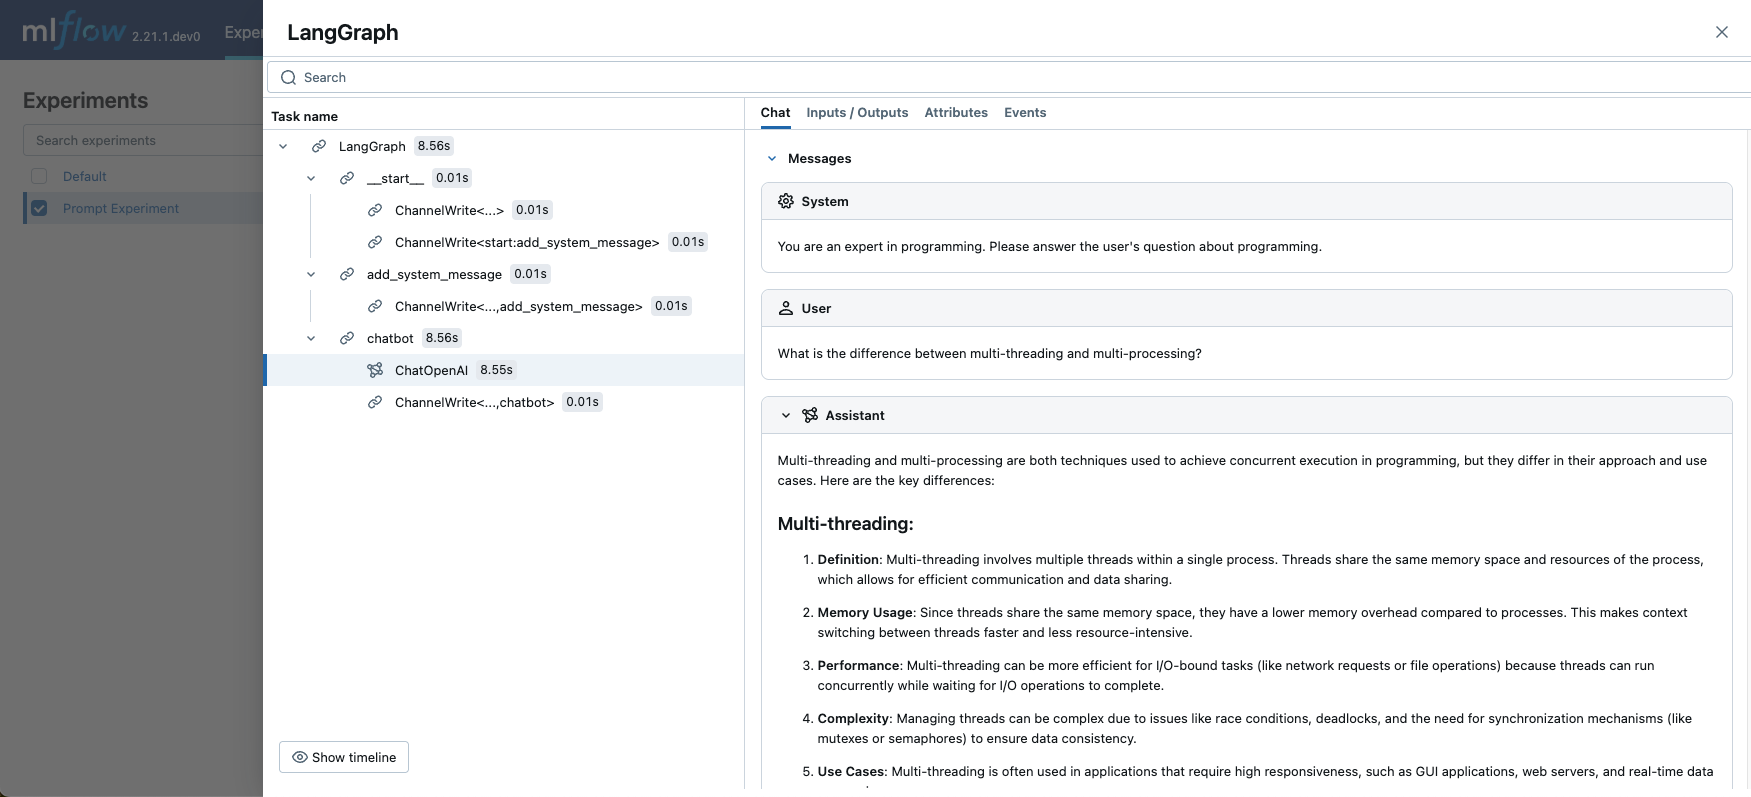
最后,让我们加载 Graph 并调用它,看看聊天机器人的实际效果。
# Enable MLflow tracing for LangChain to view the prompt passed to LLM.
mlflow.langchain.autolog()

# Load the graph
graph = mlflow.langchain.load_model(model_info.model_uri)

graph.invoke(
    {
        "messages": [
            {
                "role": "user",
                "content": "What is the difference between multi-threading and multi-processing?",
            }
        ]
    }
)