使用 MLflow 跟踪超参数调优
超参数调优是提高机器学习模型性能的重要过程,然而,手动跟踪和比较不同的试验可能很麻烦。MLflow 提供了一个强大的超参数调优框架,允许您系统地探索超参数空间并找到最佳模型。
在本教程结束时,您将了解如何
- 使用 MLflow 跟踪设置您的环境。
- 定义一个用于拟合机器学习模型的偏函数,该模型可与超参数调优库一起使用。
- 使用 Optuna 进行超参数调优。
- 利用 MLflow 中的子运行来跟踪超参数调优过程中的每次迭代。
先决条件:设置 MLflow 和 Optuna
MLflow 可在 PyPI 上获取。使用以下命令安装 MLflow 和 Optuna(超参数调优库):
pip install mlflow optuna
然后,请按照 设置 MLflow 指南中的说明进行 MLflow 的设置。
对于生产环境或团队协作,请考虑托管一个共享的 MLflow 跟踪服务器。有关完全托管的解决方案,请访问 Databricks 试用注册页面 并按照其中的说明进行操作,以开始使用 Databricks 免费试用。
步骤 1:创建新实验
import mlflow

# The set_experiment API creates a new experiment if it doesn't exist.
mlflow.set_experiment("Hyperparameter Tuning Experiment")
步骤 2:准备您的数据
首先,让我们加载一个示例数据集并将其分割成训练集和验证集。
from sklearn.model_selection import train_test_split
from sklearn.datasets import fetch_california_housing

X, y = fetch_california_housing(return_X_y=True)
X_train, X_val, y_train, y_val = train_test_split(X, y, random_state=0)
步骤 3:定义目标函数
在 Optuna 中,study 是一个单一的优化任务,代表由多个 trial 组成的整个超参数调优会话。Trial 是对目标函数的单次执行,即使用单个超参数组合训练模型。
在 MLflow 中,此结构由一个父运行和子运行表示。父运行是包含不同 trial 的所有子运行的运行。父子关系使我们能够跟踪超参数调优过程中的每次 trial,并在 MLflow UI 中对它们进行分组。
首先,我们定义每次 trial 执行的目标函数。为了记录参数、指标和模型文件,我们在目标函数中使用 MLflow 的 API。使用 nested=True 标志创建 MLflow 运行,以指示它是子运行。
import mlflow
import optuna
import sklearn


def objective(trial):
    # Setting nested=True will create a child run under the parent run.
    with mlflow.start_run(nested=True, run_name=f"trial_{trial.number}") as child_run:
        rf_max_depth = trial.suggest_int("rf_max_depth", 2, 32)
        rf_n_estimators = trial.suggest_int("rf_n_estimators", 50, 300, step=10)
        rf_max_features = trial.suggest_float("rf_max_features", 0.2, 1.0)
        params = {
            "max_depth": rf_max_depth,
            "n_estimators": rf_n_estimators,
            "max_features": rf_max_features,
        }
        # Log current trial's parameters
        mlflow.log_params(params)

        regressor_obj = sklearn.ensemble.RandomForestRegressor(**params)
        regressor_obj.fit(X_train, y_train)

        y_pred = regressor_obj.predict(X_val)
        error = sklearn.metrics.mean_squared_error(y_val, y_pred)
        # Log current trial's error metric
        mlflow.log_metrics({"error": error})

        # Log the model file
        mlflow.sklearn.log_model(regressor_obj, name="model")
        # Make it easy to retrieve the best-performing child run later
        trial.set_user_attr("run_id", child_run.info.run_id)
        return error
步骤 3:运行超参数调优研究
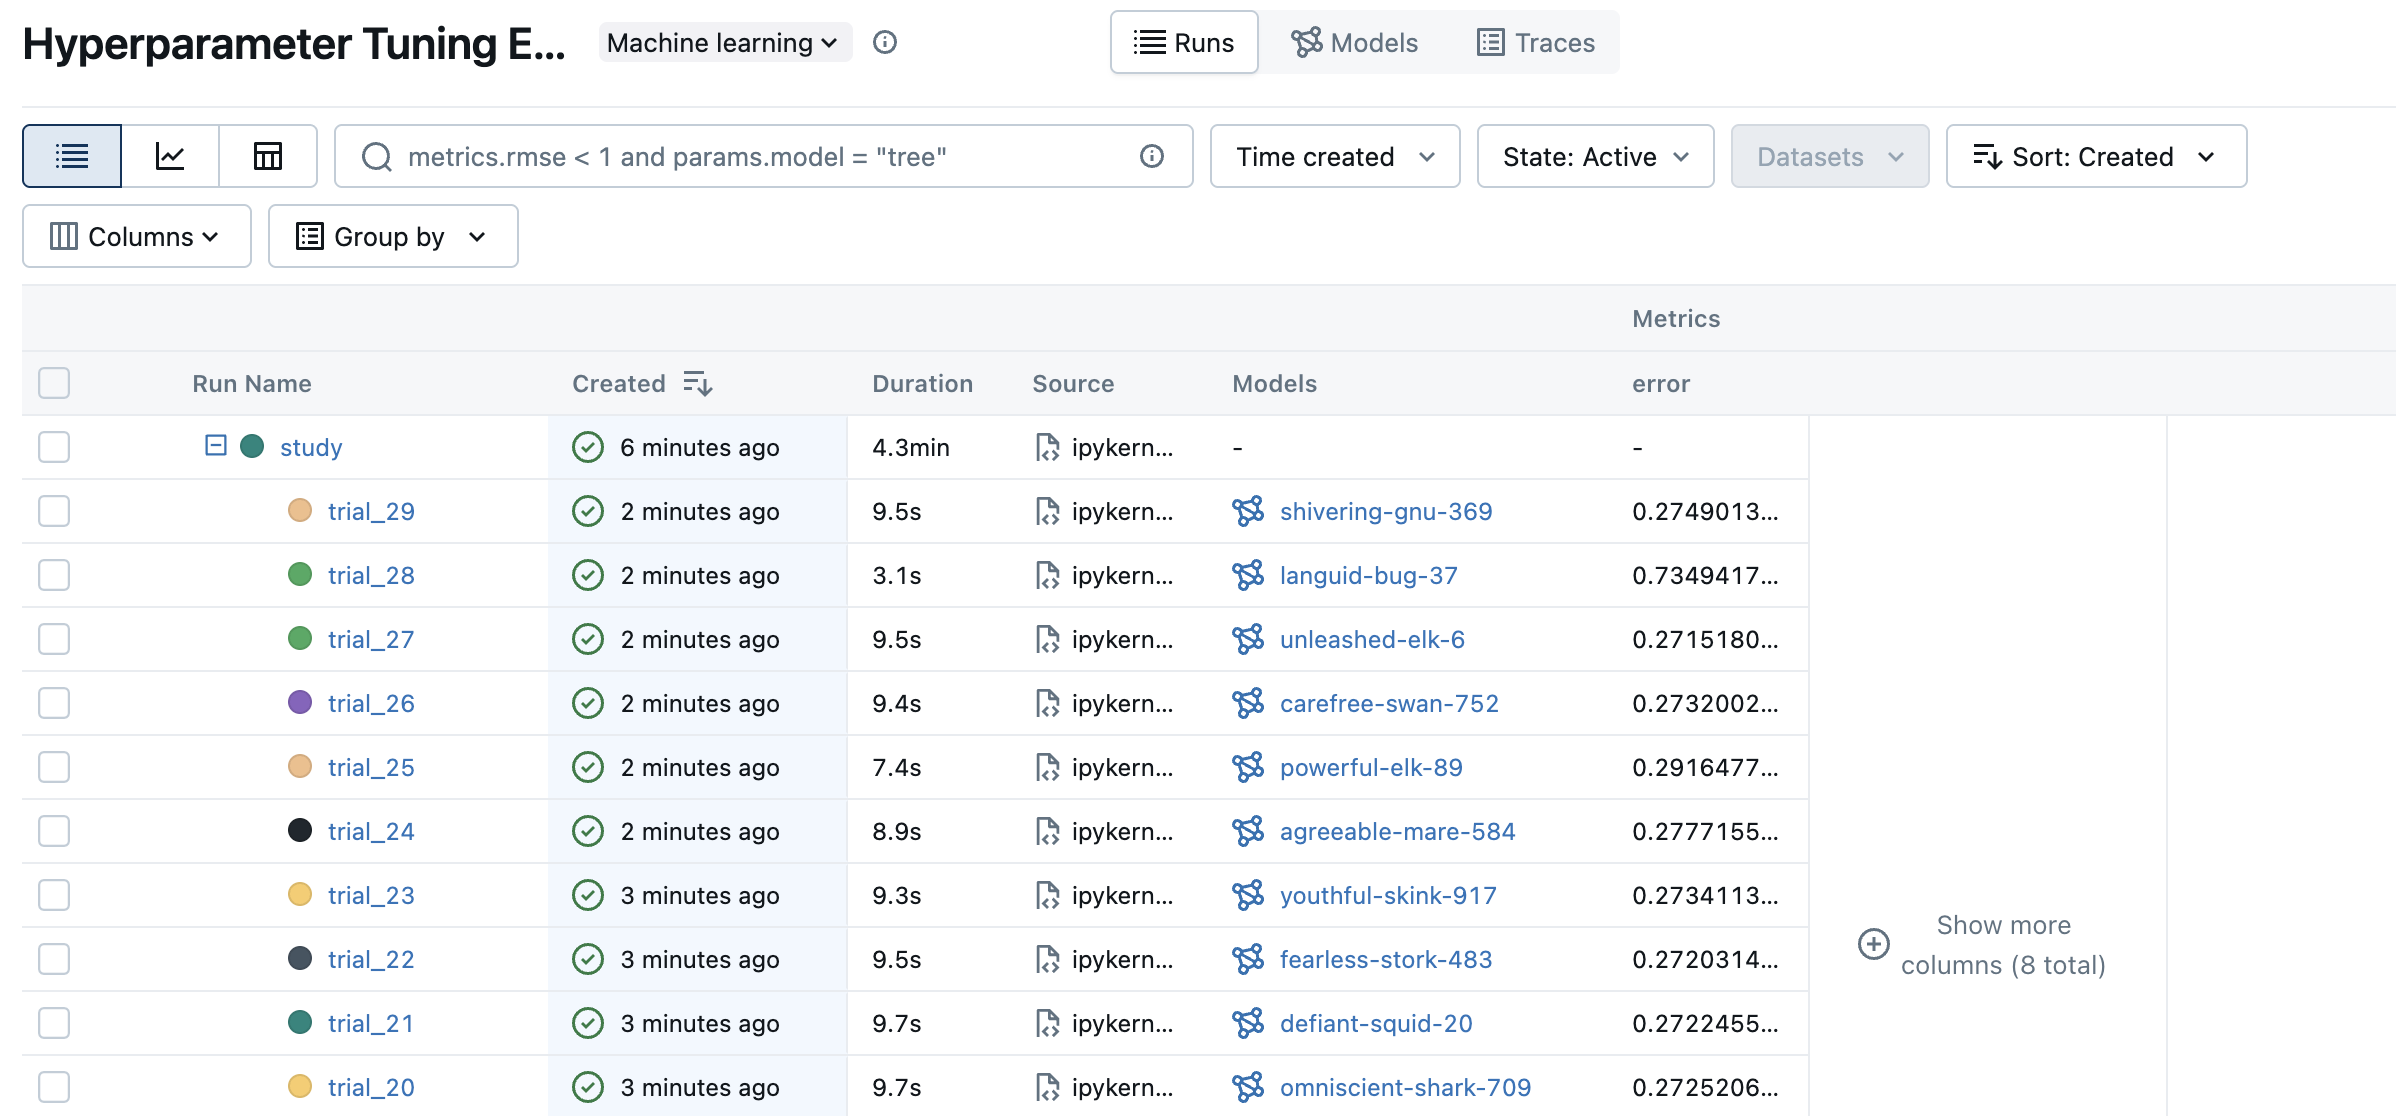
现在,让我们使用 Optuna 运行超参数调优研究。我们创建一个名为“study”的父运行,并将最佳 trial 的参数和指标记录在那里。
# Create a parent run that contains all child runs for different trials
with mlflow.start_run(run_name="study") as run:
    # Log the experiment settings
    n_trials = 30
    mlflow.log_param("n_trials", n_trials)

    study = optuna.create_study(direction="minimize")
    study.optimize(objective, n_trials=n_trials)

    # Log the best trial and its run ID
    mlflow.log_params(study.best_trial.params)
    mlflow.log_metrics({"best_error": study.best_value})
    if best_run_id := study.best_trial.user_attrs.get("run_id"):
        mlflow.log_param("best_child_run_id", best_run_id)
步骤 4:在 MLflow UI 中查看结果
要查看训练结果,您可以访问跟踪服务器 URL 来访问 MLflow UI。如果您尚未启动跟踪服务器,请打开一个新的终端,在 MLflow 项目的根目录下运行以下命令,然后通过 https://:5000(或您指定的端口号)访问 UI。
mlflow server --port 5000
打开网站后,您将看到一个类似于以下内容的屏幕:
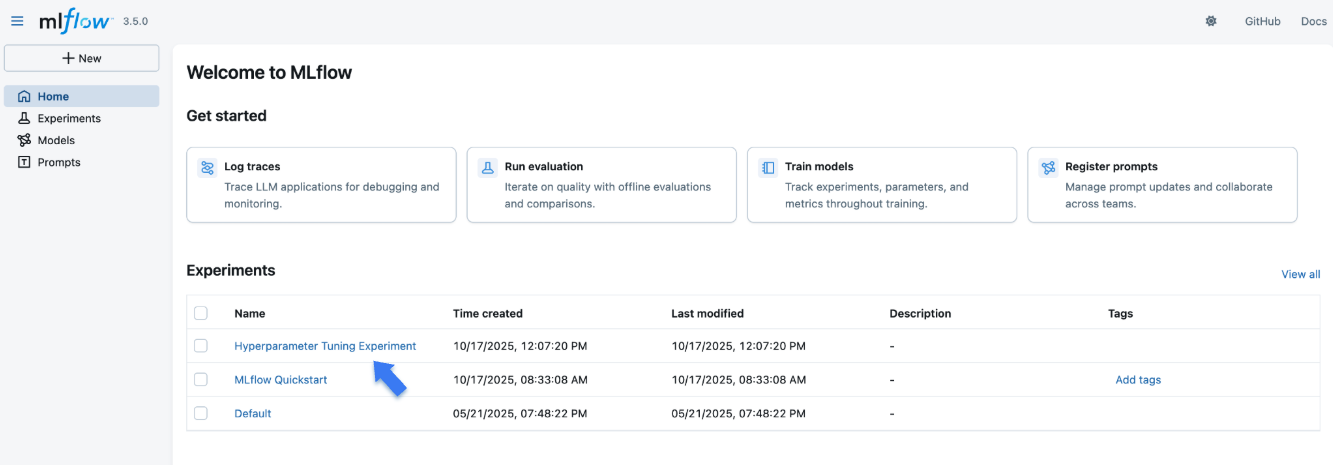
“Experiments”部分显示了(最近创建的)实验列表。单击本教程中创建的“Hyperparameter Tuning Experiment”实验。
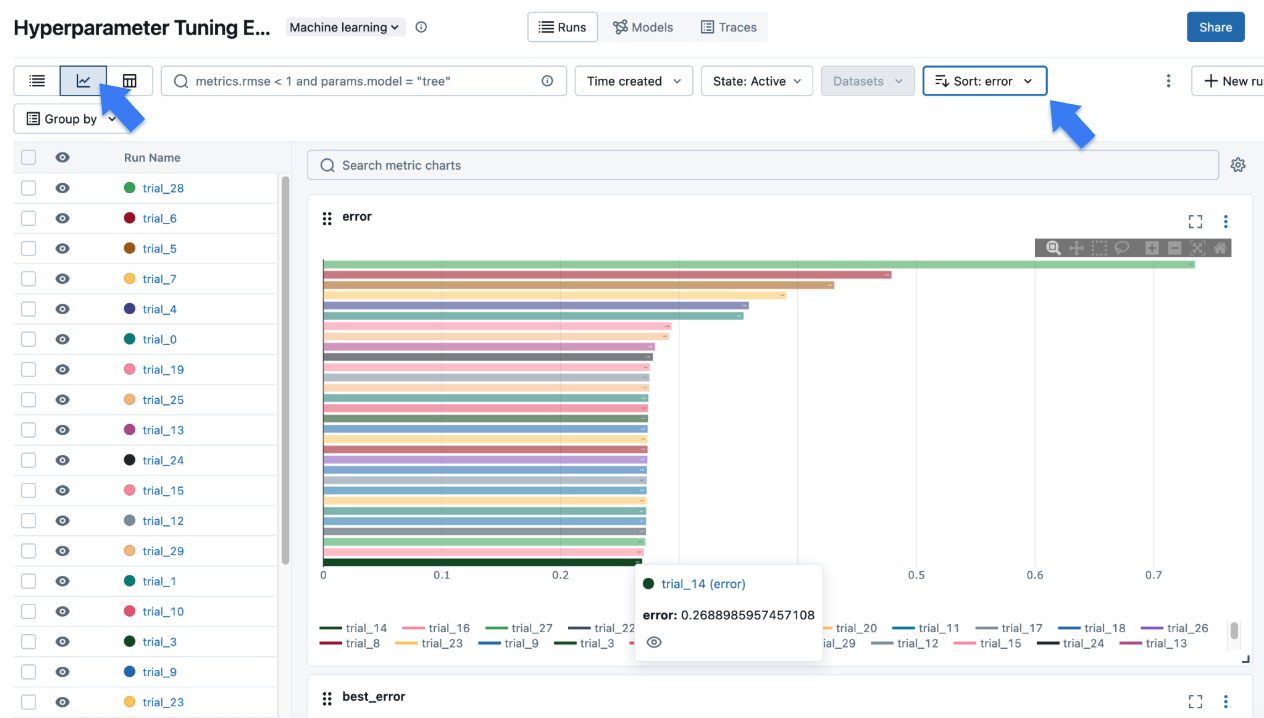
单击左上角的图表图标以查看调优结果的可视化表示。您可以进一步单击每个子运行以查看每次 trial 的详细指标和参数。
步骤 5:注册您的最佳模型
一旦确定了最佳 trial,就可以将模型注册到 MLflow 模型注册表 中,以便将其推广到生产环境。
# Register the best model using the model URI
mlflow.register_model(
    model_uri="runs:/d0210c58afff4737a306a2fbc5f1ff8d/model",
    name="housing-price-predictor",
)

# > Successfully registered model 'housing-price-predictor'.
# > Created version '1' of model 'housing-price-predictor'.
后续步骤
- MLflow Tracking:详细了解 MLflow 跟踪 API。
- MLflow 模型注册表:了解如何在 MLflow 模型注册表中注册和管理模型生命周期。
- MLflow for Deep Learning:了解如何将 MLflow 用于 PyTorch、TensorFlow 等深度学习框架。
- Self-hosting Guide:了解如何自托管 MLflow 跟踪服务器并为其设置团队协作。