探索已注册模型
既然我们已经记录了一个实验并注册了与该实验运行关联的模型,那么让我们观察一下这些信息实际上是如何在 MLflow UI 和我们的本地目录中存储的。请注意,我们也可以通过编程方式获取这些信息,但为了解释目的,我们将使用 MLflow UI。
步骤 1:探索 mlruns 目录
鉴于我们使用本地文件系统作为跟踪服务器和模型注册表,让我们观察在前面步骤中运行 python 脚本时创建的目录结构。
在深入探讨之前,需要注意的是,MLflow 旨在抽象用户的复杂性,此目录结构仅用于说明目的。此外,在远程部署(建议用于生产用例)中,跟踪服务器将位于对象存储(S3、ADLS、GCS 等),模型注册表将位于关系数据库(PostgreSQL、MySQL 等)。
mlruns/
├── 0/                                    # Experiment ID
│   ├── bc6dc2a4f38d47b4b0c99d154bbc77ad/ # Run ID
│   │   ├── metrics/
│   │   │   └── mse                       # Example metric file for mean squared error
│   │   ├── artifacts/                    # Artifacts associated with our run
│   │   │   └── sklearn-model/
│   │   │       ├── python_env.yaml
│   │   │       ├── requirements.txt      # Python package requirements
│   │   │       ├── MLmodel               # MLflow model file with model metadata
│   │   │       ├── model.pkl             # Serialized model file
│   │   │       ├── input_example.json
│   │   │       └── conda.yaml
│   │   ├── tags/
│   │   │   ├── mlflow.user
│   │   │   ├── mlflow.source.git.commit
│   │   │   ├── mlflow.runName
│   │   │   ├── mlflow.source.name
│   │   │   ├── mlflow.log-model.history
│   │   │   └── mlflow.source.type
│   │   ├── params/
│   │   │   ├── max_depth
│   │   │   └── random_state
│   │   └── meta.yaml
│   └── meta.yaml
├── models/                               # Model Registry Directory
    ├── sk-learn-random-forest-reg-model/ # Registered model name
    │   ├── version-1/                    # Model version directory
    │   │   └── meta.yaml
    │   └── meta.yaml
跟踪服务器按**实验 ID** 和**运行 ID** 组织,负责存储我们的实验工件、参数和指标。另一方面,模型注册表只存储带有指向我们跟踪服务器的指针的元数据。
如您所见,支持自动日志记录的“风格”开箱即用地提供了大量额外信息。另请注意,即使我们的目标模型没有自动日志记录,我们也可以通过显式日志记录调用轻松存储此信息。
另一个有趣的提示是,默认情况下,您可以通过三种方式管理模型的环境:python_env.yaml (python 虚拟环境)、requirements.txt (PyPi 依赖) 和 conda.yaml (conda 环境)。
现在我们对记录的内容有了一个非常高层次的理解,让我们使用 MLflow UI 来查看这些信息。
步骤 2:启动跟踪服务器
在与 mlruns 文件夹相同的目录中,运行以下命令。
mlflow server --host 127.0.0.1 --port 8080
[2024-02-05 12:43:10 -0500] [26393] [INFO] Starting gunicorn 20.1.0
[2024-02-05 12:43:10 -0500] [26393] [INFO] Listening at: http://127.0.0.1:8080 (26393)
[2024-02-05 12:43:10 -0500] [26393] [INFO] Using worker: sync
[2024-02-05 12:43:10 -0500] [26414] [INFO] Booting worker with pid: 26414
[2024-02-05 12:43:11 -0500] [26416] [INFO] Booting worker with pid: 26416
[2024-02-05 12:43:11 -0500] [26428] [INFO] Booting worker with pid: 26428
[2024-02-05 12:43:11 -0500] [26437] [INFO] Booting worker with pid: 26437
步骤 3:查看跟踪服务器
如果没有错误,您可以打开网络浏览器并访问 https://:8080 查看 MLflow UI。
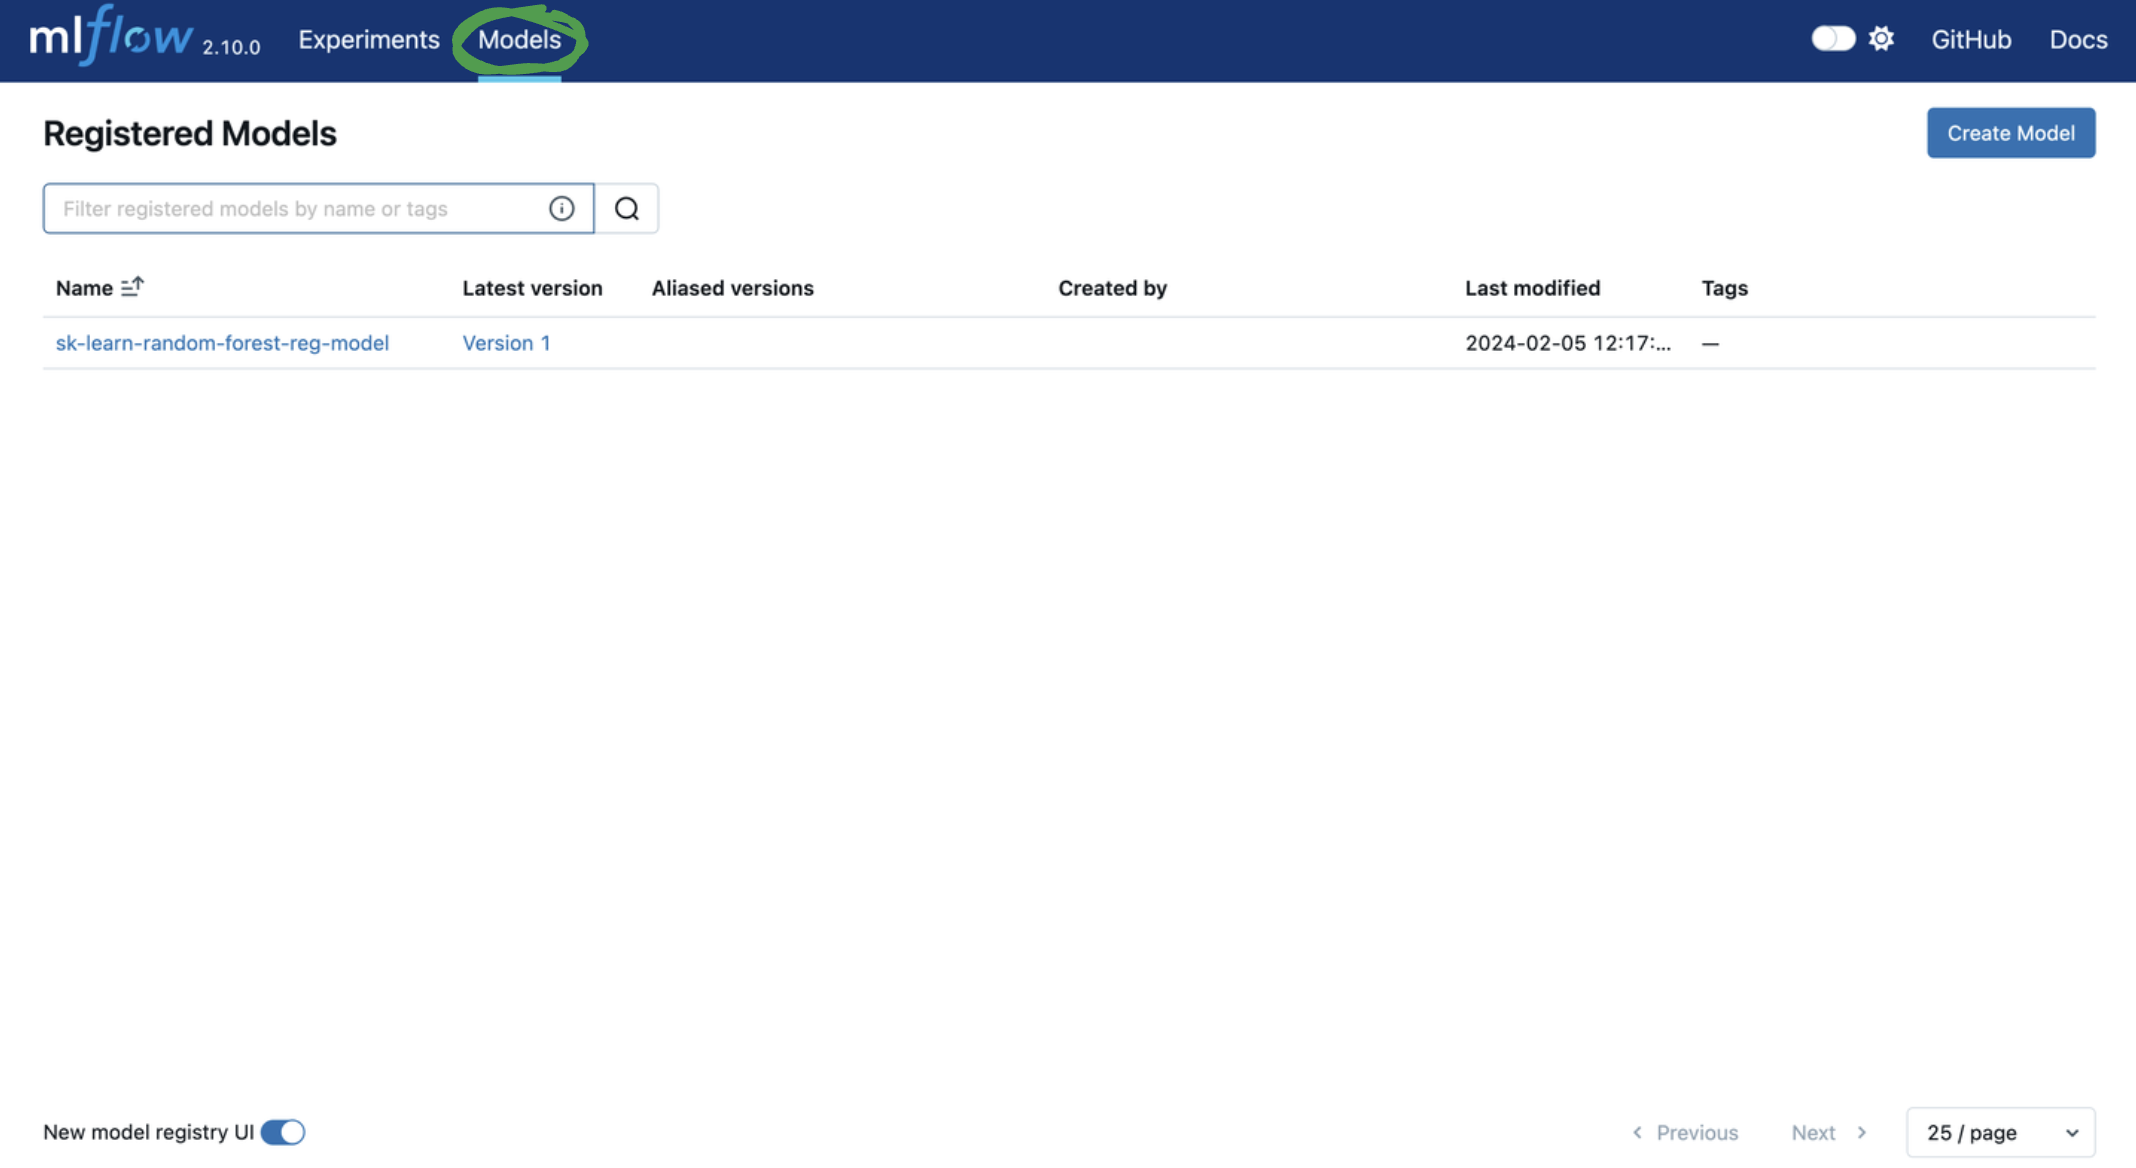
首先,让我们离开实验跟踪选项卡,访问模型注册表。
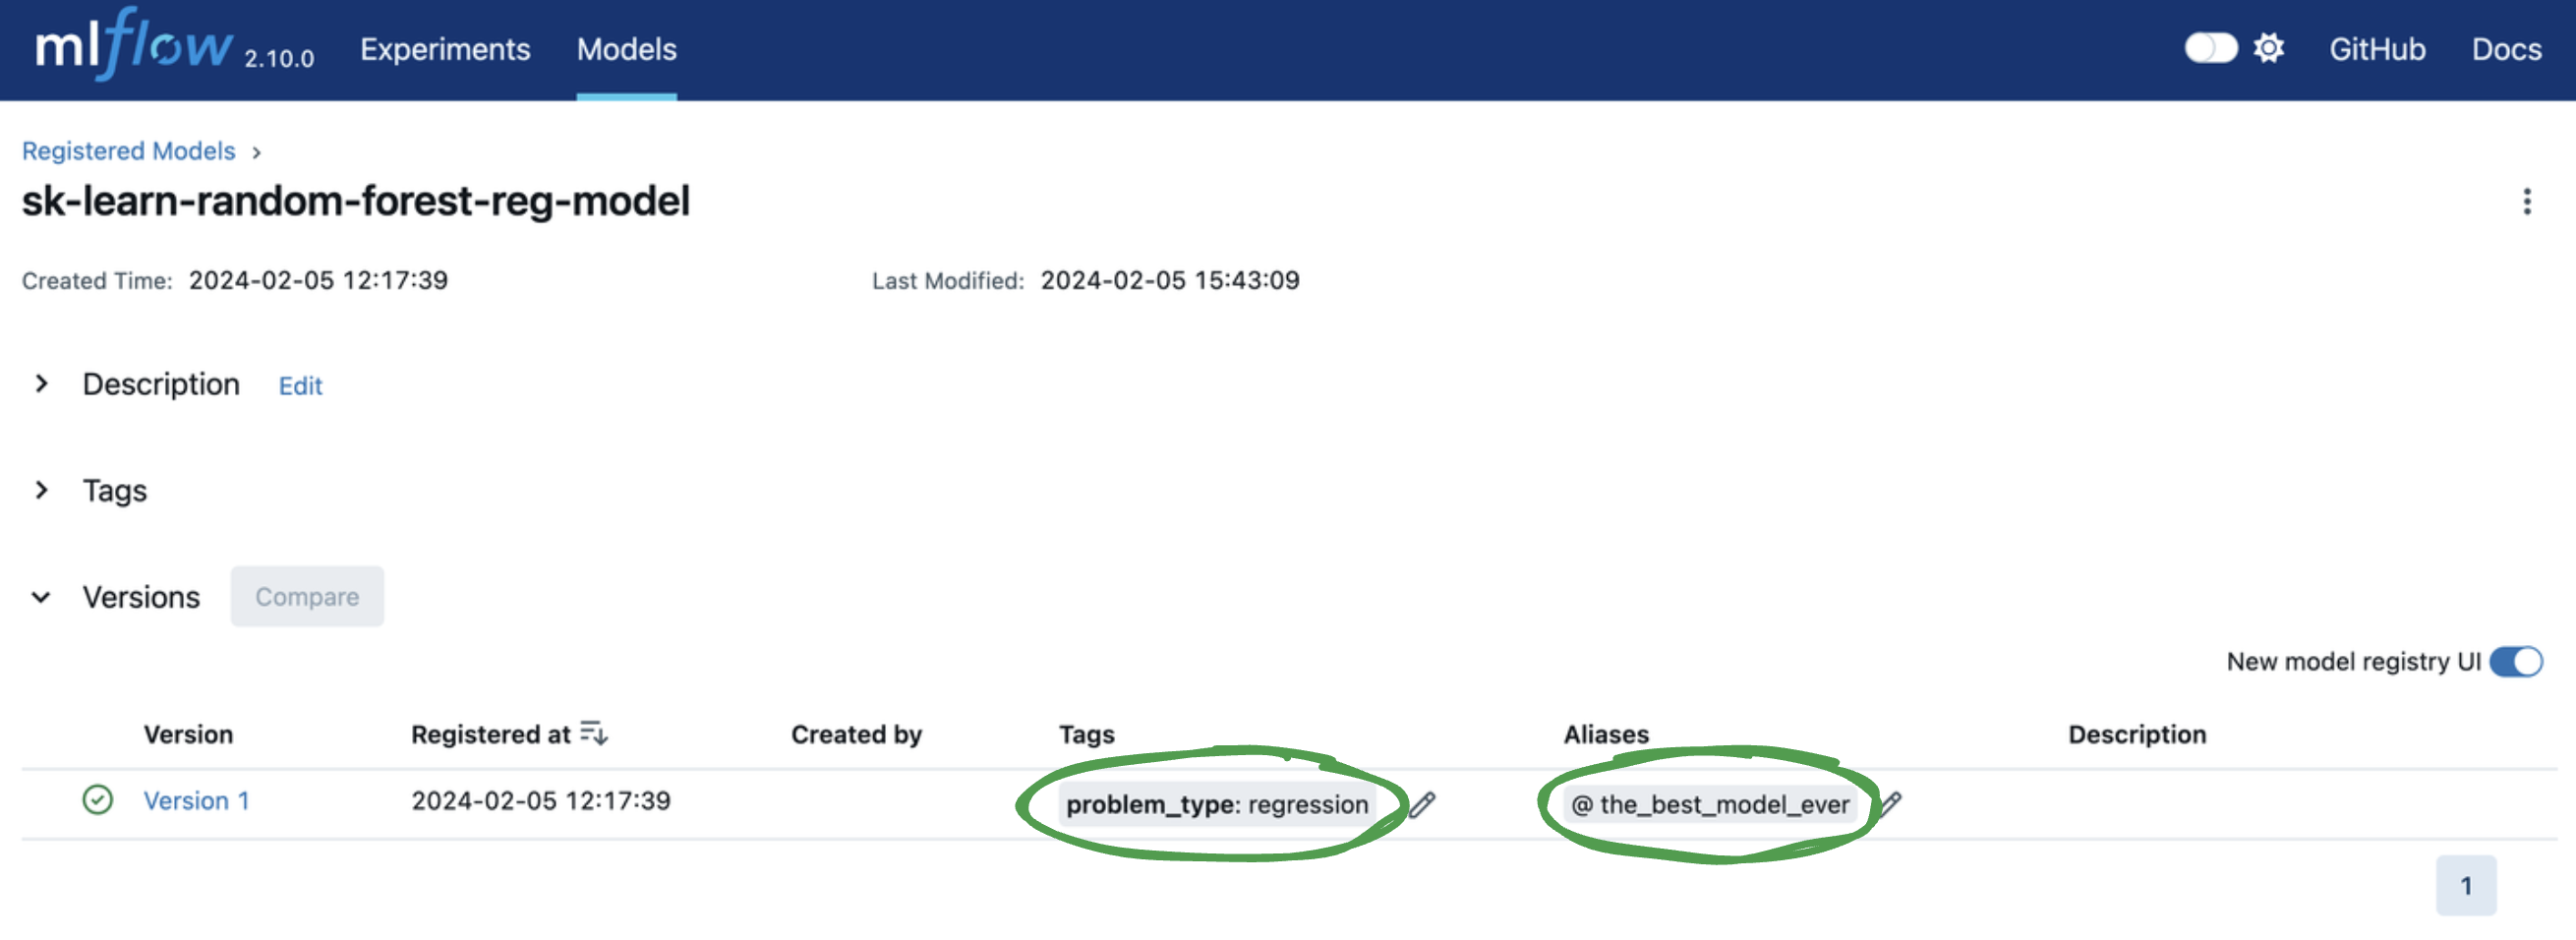
接下来,让我们添加标签和模型版本别名以方便模型部署。您可以通过单击模型版本表中的相应“添加”链接或铅笔图标来添加或编辑标签和别名。让我们...
- 添加一个模型版本标签,键为
problem_type,值为regression。 - 添加一个模型版本别名
the_best_model_ever。
本教程的下一部分围绕在 MLflow UI 中从注册表加载模型展开。