AutoGen 与自定义 PyFunc


在本篇博文中,我们将指导您在 MLflow 自定义 PyFunc 中创建 AutoGen 代理框架。通过将 MLflow 与 AutoGen 的多代理框架创建能力相结合,我们能够构建可扩展且稳定的 GenAI 应用程序。
代理框架
代理框架通过在每个步骤集成离散逻辑,使自主代理能够处理复杂的、多轮的任务。这些框架对于 LLM 驱动的工作流至关重要,在这些工作流中,代理管理跨多个阶段的动态交互。每个代理根据特定逻辑运行,从而实现精确的任务自动化、决策和协调。这非常适合工作流编排、客户支持和多代理系统等应用,在这些应用中,LLM 必须解释不断变化的内容并做出相应响应。
使用 AutoGen 的代理框架
AutoGen 是一个开源编程框架,旨在构建基于代理的 AI 系统。它提供了一个多代理对话框架,允许用户通过高级抽象来构建 复杂的 LLM 工作流。AutoGen 通过提供预构建的系统,简化了跨各种领域的不同应用程序的创建。此外,它通过专用 API 增强了 LLM 推理和优化,从而提高了性能并降低了运营成本。该框架旨在简化代理式 AI 解决方案的开发和部署。
设置
首先,让我们安装所需的依赖项。请注意,pyautogen 要求 python>=3.9。
环境设置
%pip install pyautogen mlflow -U -q
我们还必须获取 API 凭据才能使用 LLM。在本教程中,我们将使用 OpenAI。请注意,通过 getpass 包安全地将令牌传递给交互式 Python 环境是一个好方法。
import os
from getpass import getpass

os.environ["OPENAI_API_KEY"] = getpass("OPENAI_API_KEY:")

assert os.getenv("OPENAI_API_KEY"), "Please set an OPENAI_API_KEY environment variable."
太好了!我们已经设置了身份验证配置,可以开始构建代理框架了。
使用 AutoGen 和 MLflow 创建我们的代理框架
在本教程中,我们将创建一个图像生成代理框架。其中有许多代码是从 autogen 教程复制和修改的,但核心代理功能保持不变。
代理代码
您不必担心实现的细节。从高层次来看,我们正在创建一个代理框架,它...
- 接收一个提示。
- 利用 OpenAI 的 DALLE 根据该提示创建图像。
- 迭代地“猫化”,例如,在图像中添加毛茸茸的猫。
第三步是 AutoGen 大显身手的地方。我们可以利用 AutoGen 的 MultimodalConversableAgent 来创建一个评论代理,该代理会观察图像,并根据用户提供的“添加毛茸茸的猫”的系统提示,就如何改进提示提供反馈。
import os
import re
from typing import Dict, List, Optional, Union

import matplotlib.pyplot as plt
import PIL
from diskcache import Cache
from openai import OpenAI
from PIL import Image

from autogen import Agent, AssistantAgent, ConversableAgent, UserProxyAgent
from autogen.agentchat.contrib.img_utils import _to_pil, get_image_data, get_pil_image
from autogen.agentchat.contrib.multimodal_conversable_agent import MultimodalConversableAgent

# Define our prompt of interest
CRITIC_PROMPT = """Add fluffy cats. Like a lot of cats. If there's less than 100 cats I'll be mad."""

# Define our LLM configurations

def dalle_call(client: OpenAI, model: str, prompt: str, size: str, quality: str, n: int) -> str:
    """
    Generate an image using OpenAI's DALL-E model and cache the result.

    This function takes a prompt and other parameters to generate an image using OpenAI's DALL-E model.
    It checks if the result is already cached; if so, it returns the cached image data. Otherwise,
    it calls the DALL-E API to generate the image, stores the result in the cache, and then returns it.

    Args:
        client (OpenAI): The OpenAI client instance for making API calls.
        model (str): The specific DALL-E model to use for image generation.
        prompt (str): The text prompt based on which the image is generated.
        size (str): The size specification of the image.
        quality (str): The quality setting for the image generation.
        n (int): The number of images to generate.

    Returns:
    str: The image data as a string, either retrieved from the cache or newly generated.

    Note:
    - The cache is stored in a directory named '.cache/'.
    - The function uses a tuple of (model, prompt, size, quality, n) as the key for caching.
    - The image data is obtained by making a secondary request to the URL provided by the DALL-E API response.
    """
    # Function implementation...
    cache = Cache(".cache/")  # Create a cache directory
    key = (model, prompt, size, quality, n)
    if key in cache:
        return cache[key]

    # If not in cache, compute and store the result
    response = client.images.generate(
        model=model,
        prompt=prompt,
        size=size,
        quality=quality,
        n=n,
    )
    image_url = response.data[0].url
    img_data = get_image_data(image_url)
    cache[key] = img_data

    return img_data

def extract_img(agent: Agent) -> PIL.Image:
    """
    Extracts an image from the last message of an agent and converts it to a PIL image.

    This function searches the last message sent by the given agent for an image tag,
    extracts the image data, and then converts this data into a PIL (Python Imaging Library) image object.

    Parameters:
        agent (Agent): An instance of an agent from which the last message will be retrieved.

    Returns:
        PIL.Image: A PIL image object created from the extracted image data.

    Note:
    - The function assumes that the last message contains an <img> tag with image data.
    - The image data is extracted using a regular expression that searches for <img> tags.
    - It's important that the agent's last message contains properly formatted image data for successful extraction.
    - The `_to_pil` function is used to convert the extracted image data into a PIL image.
    - If no <img> tag is found, or if the image data is not correctly formatted, the function may raise an error.
    """
    last_message = agent.last_message()["content"]

    if isinstance(last_message, str):
        img_data = re.findall("<img (.*)>", last_message)[0]
    elif isinstance(last_message, list):
        # The GPT-4V format, where the content is an array of data
        assert isinstance(last_message[0], dict)
        img_data = last_message[0]["image_url"]["url"]

    pil_img = get_pil_image(img_data)
    return pil_img

class DALLEAgent(ConversableAgent):
    def __init__(self, name, llm_config: dict, **kwargs):
        super().__init__(name, llm_config=llm_config, **kwargs)

        api_key = os.getenv("OPENAI_API_KEY")
        self._dalle_client = OpenAI(api_key=api_key)
        self.register_reply([Agent, None], DALLEAgent.generate_dalle_reply)

    def send(
        self,
        message: Union[Dict, str],
        recipient: Agent,
        request_reply: Optional[bool] = None,
        silent: Optional[bool] = False,
    ):
        # override and always "silent" the send out message;
        # otherwise, the print log would be super long!
        super().send(message, recipient, request_reply, silent=True)

    def generate_dalle_reply(self, messages: Optional[List[Dict]], sender: "Agent", config):
        """Generate a reply using OpenAI DALLE call."""
        client = self._dalle_client if config is None else config
        if client is None:
            return False, None
        if messages is None:
            messages = self._oai_messages[sender]

        prompt = messages[-1]["content"]
        img_data = dalle_call(
            client=client,
            model="dall-e-3",
            prompt=prompt,
            size="1024x1024",
            quality="standard",
            n=1,
        )

        img_data = _to_pil(img_data)  # Convert to PIL image

        # Return the OpenAI message format
        return True, {"content": [{"type": "image_url", "image_url": {"url": img_data}}]}

class CatifyWithDalle(AssistantAgent):
    def __init__(self, n_iters=2, **kwargs):
        """
        Initializes a CatifyWithDalle instance.

        This agent facilitates the creation of visualizations through a collaborative effort among
        its child agents: dalle and critics.

        Parameters:
            - n_iters (int, optional): The number of "improvement" iterations to run. Defaults to 2.
            - **kwargs: keyword arguments for the parent AssistantAgent.
        """
        super().__init__(**kwargs)
        self.register_reply([Agent, None], reply_func=CatifyWithDalle._reply_user, position=0)
        self._n_iters = n_iters

    def _reply_user(self, messages=None, sender=None, config=None):
        if all((messages is None, sender is None)):
            error_msg = f"Either {messages=} or {sender=} must be provided."
            raise AssertionError(error_msg)

        if messages is None:
            messages = self._oai_messages[sender]

        img_prompt = messages[-1]["content"]

        ## Define the agents
        self.critics = MultimodalConversableAgent(
            name="Critics",
            system_message=f"""You need to improve the prompt of the figures you saw.
{CRITIC_PROMPT}
Reply with the following format:

CRITICS: the image needs to improve...
PROMPT: here is the updated prompt!

""",
            llm_config={"max_tokens": 1000, "model": "gpt-4o"},
            human_input_mode="NEVER",
            max_consecutive_auto_reply=3,
        )

        self.dalle = DALLEAgent(
            name="Dalle", llm_config={"model": "dalle"}, max_consecutive_auto_reply=0
        )

        # Data flow begins
        self.send(message=img_prompt, recipient=self.dalle, request_reply=True)
        img = extract_img(self.dalle)
        plt.imshow(img)
        plt.axis("off")  # Turn off axis numbers
        plt.show()
        print("Image PLOTTED")

        for i in range(self._n_iters):
            # Downsample the image s.t. GPT-4V can take
            img = extract_img(self.dalle)
            smaller_image = img.resize((128, 128), Image.Resampling.LANCZOS)
            smaller_image.save("result.png")

            self.msg_to_critics = f"""Here is the prompt: {img_prompt}.
            Here is the figure <img result.png>.
            Now, critique and create a prompt so that DALLE can give me a better image.
            Show me both "CRITICS" and "PROMPT"!
            """
            self.send(message=self.msg_to_critics, recipient=self.critics, request_reply=True)
            feedback = self._oai_messages[self.critics][-1]["content"]
            img_prompt = re.findall("PROMPT: (.*)", feedback)[0]

            self.send(message=img_prompt, recipient=self.dalle, request_reply=True)
            img = extract_img(self.dalle)
            plt.imshow(img)
            plt.axis("off")  # Turn off axis numbers
            plt.show()
            print(f"Image {i} PLOTTED")

        return True, "result.jpg"
太好了!我们有了一个代理框架。为了快速展示它的工作原理,让我们实例化我们的代理并给它一个提示。
creator = CatifyWithDalle(
    name="creator",
    max_consecutive_auto_reply=0,
    system_message="Help me coordinate generating image",
    llm_config={"model": "gpt-4"},
)

user_proxy = UserProxyAgent(
    name="User",
    human_input_mode="NEVER",
    max_consecutive_auto_reply=0,
    code_execution_config={
        "work_dir": "output", # Location where code will be written
        "use_docker": False # Use local jupyter execution environment instead of docker
    }
)

_ = user_proxy.initiate_chat(
    creator, message="Show me something boring"
)
用户提示的第一次迭代的初始结果
User (to creator):

Show me something boring

creator (to Dalle):

Show me something boring
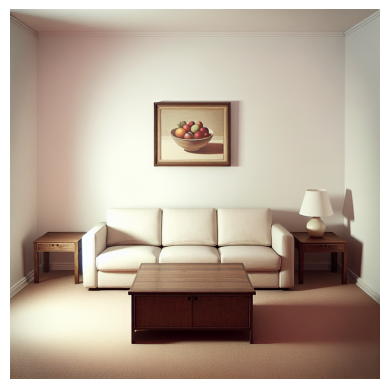
这绝对是一个无聊的房间。请注意评论员的反应以及评论员在后续迭代中如何改进提交的提示。
Image PLOTTED
creator (to Critics):

Here is the prompt: Show me something boring.
Here is the figure `<image>`.
Now, critique and create a prompt so that DALLE can give me a better image.
Show me both "CRITICS" and "PROMPT"!

Critics (to creator):

CRITICS: The image is simple and mundane, with a plain room and basic furniture, which accomplishes the task of showing something boring. However, it can be improved by adding an element of whimsy or interest, juxtaposing the boring scene with something unexpected. Let's add a lot of cats to make it more engaging.

PROMPT: Show me a boring living room with plain furniture, but add 100 cats in various places around the room.

creator (to Dalle):

Show me a boring living room with plain furniture, but add 100 cats in various places around the room.
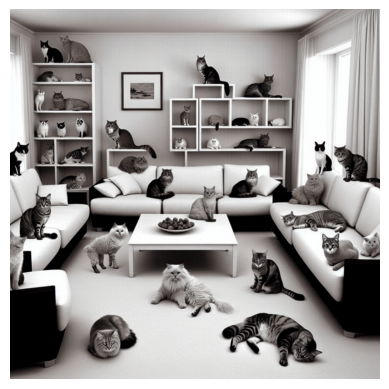
在最后一次迭代中,我们可以看到一个更精炼的指令集,用于添加其他细节。
Image 0 PLOTTED
creator (to Critics):

Here is the prompt: Show me a boring living room with plain furniture, but add 100 cats in various places around the room..
Here is the figure `<image>`.
Now, critique and create a prompt so that DALLE can give me a better image.
Show me both "CRITICS" and "PROMPT"!

Critics (to creator):

CRITICS: The image has successfully incorporated cats into a boring living room, bringing in an element of surprise and quirkiness. However, it is in black and white, which can make the image feel duller and less lively. Additionally, while there are many cats, they could be positioned in more playful and unexpected ways to create more interest.

PROMPT: Show me a colorful, boring living room with plain furniture, but add 100 cats in various imaginative and playful positions around the room.

creator (to Dalle):

Show me a colorful, boring living room with plain furniture, but add 100 cats in various imaginative and playful positions around the room.
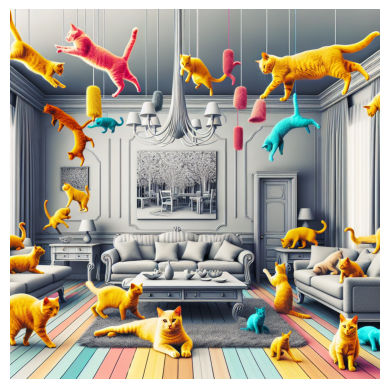
在没有任何直接干预的情况下,我们现在得到了一幅图像,其风格与原始用户指令截然不同。代理已成功地将异想天开的元素引入了原始指令集。
来自代码的 MLflow 模型
既然我们已经证明了概念,现在是时候利用 MLflow 来管理我们的 ML 模型生命周期了。例如,我们很可能希望将此模型投入生产,因此强大的依赖项管理、模型版本控制以及对开发周期之间跟踪的支持都将非常有用。
在本篇博文中,我们将利用 来自代码的模型功能来实现上述功能。来自代码的 MLflow 模型允许您直接从独立的 Python 脚本定义和记录模型。当您希望记录可以有效存储为代码表示(不需要通过训练进行优化权重)的模型或依赖于外部服务的应用程序(例如 LangChain 链)时,此功能特别有用。另一个好处是,这种方法完全绕过了 Python 中使用 pickle 或 cloudpickle 模块,这可能会带来安全风险。
要利用来自代码的模型,我们必须执行以下步骤
- 声明一个 自定义 PyFunc
- 利用 mlflow.models.set_model 来指示哪个 Python 对象是我们的模型。
为了实现这些步骤,我们只需将上面和下面的代码复制到一个 Python 文件中。为了简单起见,您可以只创建一个包含这两个代码片段的 Python 文件,但 MLflow 也支持在通过 mlflow.pyfunc.lod_model 记录模型时指定本地依赖项,使用 code_paths 参数。
为了简洁起见,此步骤已被省略,必须手动完成。
import mlflow

class CatifyPyfunc(mlflow.pyfunc.PythonModel):
  def predict(self, context, model_input, params):
    import mlflow
    mlflow.autogen.autolog()

    creator = CatifyWithDalle(
            name="creator",
            max_consecutive_auto_reply=0,
            system_message="Help me coordinate generating image",
            llm_config={"model":"gpt-4"},
        )

    user_proxy = UserProxyAgent(name="User", human_input_mode="NEVER", max_consecutive_auto_reply=0, code_execution_config={
                "work_dir": "output", # Location where code will be written
                "use_docker": False # Use local jupyter execution environment instead of docker
            })

    return user_proxy.initiate_chat(
        creator, message=model_input
    )
mlflow.models.set_model(CatifyPyfunc())
在此步骤结束时,您应该会得到一个包含两个代码片段的 Python 文件。文件名由用户决定,但本博文将使用“catify_model.py”。
使用我们的代理框架
现在,我们可以利用 MLflow 与我们强大的“猫化”代理进行交互了。
记录和加载
首先,让我们演示将模型记录到 MLflow 跟踪服务器的标准用户流程。然后我们将加载它并执行推理。
import mlflow
mlflow.autogen.autolog() # Enable logging of traces

with mlflow.start_run() as run:
    mlflow.pyfunc.log_model(
        artifact_path="autogen_pyfunc",
        python_model="catify_model.py", # Our model from code python file

    )

    run_id = run.info.run_id
模型已记录,让我们重新加载它并执行推理,这次使用一个更酷的提示。
loaded = mlflow.pyfunc.load_model(f"runs:/{run_id}/autogen_pyfunc")
out = loaded.predict("The matrix with a cat")
第一阶段的结果
User (to creator):

The matrix with a cat

creator (to Dalle):

The matrix with a cat
在下一阶段,评论代理大大增强了生成提示。
Image PLOTTED
creator (to Critics):

Here is the prompt: The matrix with a cat.
Here is the figure `<image>`.
Now, critique and create a prompt so that DALLE can give me a better image.
Show me both "CRITICS" and "PROMPT"!

Critics (to creator):

CRITICS: The image effectively captures the Matrix-themed aesthetic with a cat, combining a cyberpunk atmosphere with digital elements. However, to improve the image:

- Increase the number of cats to align with the requirement of having lots of cats (aim for around 100).
- Enhance the digital and neon elements to make the Matrix theme more pronounced.
- Add more movement or dynamic elements to the scene for a more immersive feel.
- Ensure diversity in cat appearances, sizes, and positions to make the scene more complex and interesting.

PROMPT: "Create a Matrix-themed scene set in a cyberpunk alleyway, with digital and neon elements filling the atmosphere. The scene should feature around 100 cats of various sizes, colors, and positions—some sitting, some walking, and some interacting with the digital elements. Make the digital grid and floating code more prominent, and add dynamic elements such as digital rain or floating holograms to create a more immersive and lively environment."

creator (to Dalle):

"Create a Matrix-themed scene set in a cyberpunk alleyway, with digital and neon elements filling the atmosphere. The scene should feature around 100 cats of various sizes, colors, and positions—some sitting, some walking, and some interacting with the digital elements. Make the digital grid and floating code more prominent, and add dynamic elements such as digital rain or floating holograms to create a more immersive and lively environment."
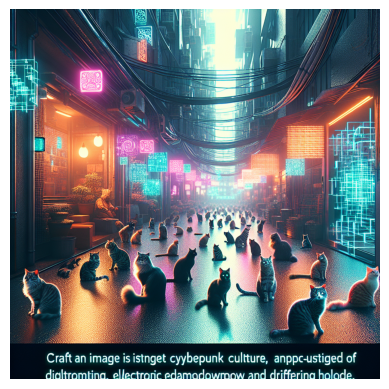
这绝对是一个改进,展示了多轮代理的力量。
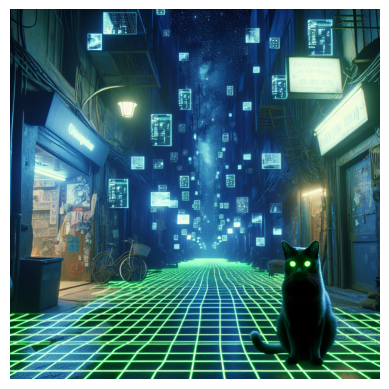
最后阶段进一步增强了指令集。
Image 0 PLOTTED
creator (to Critics):

Here is the prompt: "Create a Matrix-themed scene set in a cyberpunk alleyway, with digital and neon elements filling the atmosphere. The scene should feature around 100 cats of various sizes, colors, and positions—some sitting, some walking, and some interacting with the digital elements. Make the digital grid and floating code more prominent, and add dynamic elements such as digital rain or floating holograms to create a more immersive and lively environment.".
Here is the figure `<image>`.
Now, critique and create a prompt so that DALLE can give me a better image.
Show me both "CRITICS" and "PROMPT"!

Critics (to creator):

CRITICS: The image significantly improves the Matrix-themed atmosphere with a cyberpunk alley and an abundance of cats. However, there are a few areas for improvement:

- Increase the variety of the digital elements (e.g., different shapes of holograms, varied colors and intensities of neon signs).
- Make the cats more dynamic by showing more interactions such as jumping, playing, or chasing digital elements.
- Enhance the depth and perspective of the scene to create a more three-dimensional and immersive look.
- Add more detail to the surrounding environment, like futuristic posters or graffiti to intensify the cyberpunk feel.

PROMPT: "Craft a highly detailed, Matrix-themed scene set in a cyberpunk alleyway. The atmosphere should be rich with diverse digital and neon elements, including various shapes of holograms and a range of vivid colors. Populate the scene with around 100 dynamic cats of different sizes, colors, and actions—some sitting, some walking, some jumping, playing, or chasing digital elements. Enhance the depth and perspective of the scene to create a more immersive three-dimensional experience. Include detailed futuristic environment elements like posters, graffiti, and neon signs to intensify the cyberpunk feel."

creator (to Dalle):

"Craft a highly detailed, Matrix-themed scene set in a cyberpunk alleyway. The atmosphere should be rich with diverse digital and neon elements, including various shapes of holograms and a range of vivid colors. Populate the scene with around 100 dynamic cats of different sizes, colors, and actions—some sitting, some walking, some jumping, playing, or chasing digital elements. Enhance the depth and perspective of the scene to create a more immersive three-dimensional experience. Include detailed futuristic environment elements like posters, graffiti, and neon signs to intensify the cyberpunk feel."
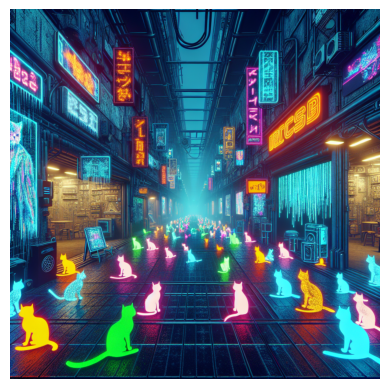
有点反乌托邦,但我们接受了!
我们已成功演示了我们可以记录和加载模型,然后从加载的模型执行推理。
显示 MLflow 跟踪
MLflow 跟踪提供了一个线程安全的 API 来跟踪复杂应用程序的执行。MLflow AutoGen flavor 内置了跟踪功能,作为自动记录功能。因此,只需在执行推理之前运行 mlflow.autogen.autolog(),我们就能自动记录跟踪。
可以通过流畅的 API、MLflow 客户端以及手动通过 MLflow UI 访问跟踪。有关更多信息,请访问上面链接的文档。
# Example with fluent APIs
last_active_trace = mlflow.get_last_active_trace()
print(last_active_trace)

# Output: Trace(request_id=71ffcf92785b4dfc965760a43193095c)
在此期间,我们将在此处显示 MLFlow UI。如果您在交互式环境(如 jupyter)中运行,请运行以下命令。
import subprocess
from IPython.display import IFrame

# Start MLflow server in the background
mlflow_ui_server = subprocess.Popen(["mlflow", "ui", "--host", "127.0.0.1", "--port", "5000"])
IFrame(src="http://127.0.0.1:5000", width="100%", height="600")

# Run the below command to stop the server
# mlflow_ui_server.terminate()
如果您不以交互方式运行,您可以简单地运行以下 shell 命令,并在 Web 浏览器中导航到相关的宿主和端口。
mlflow ui
如果我们导航到跟踪选项卡,如下面的图片所示,我们可以看到我们记录的跟踪。
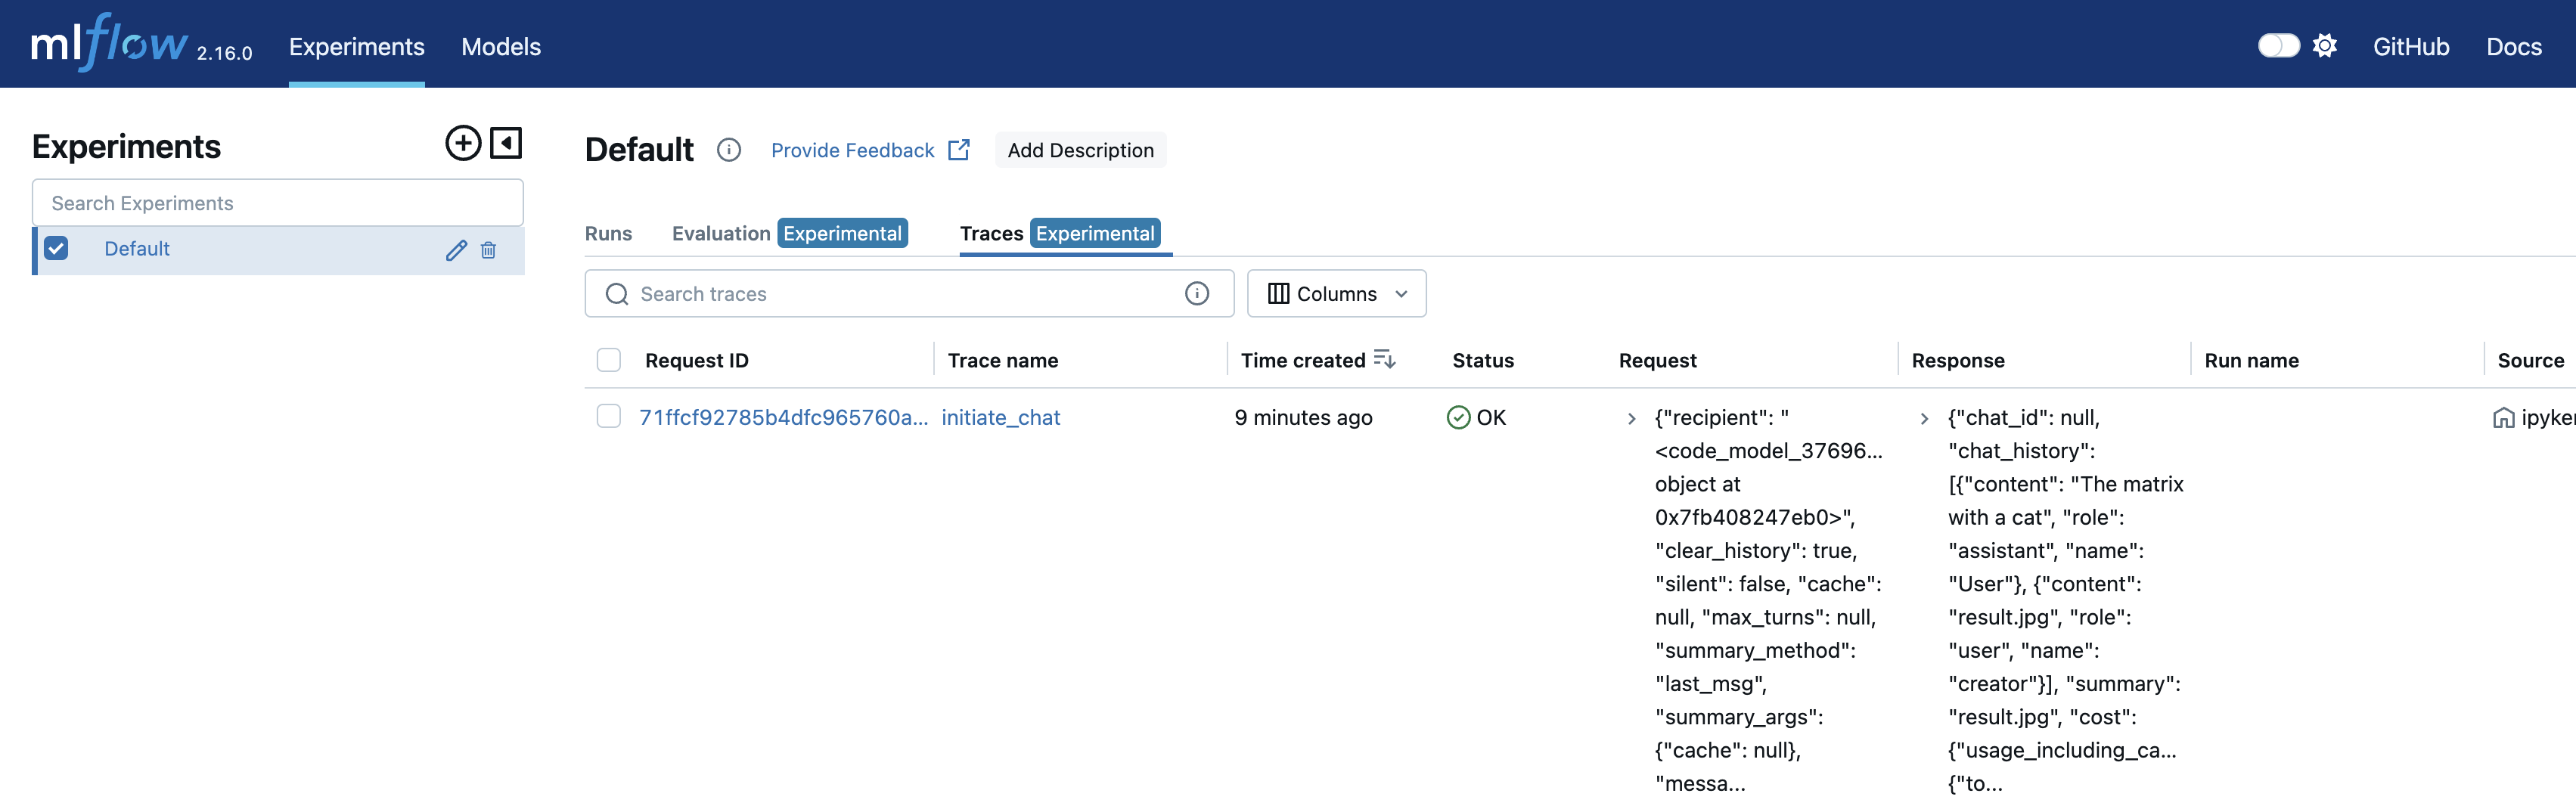
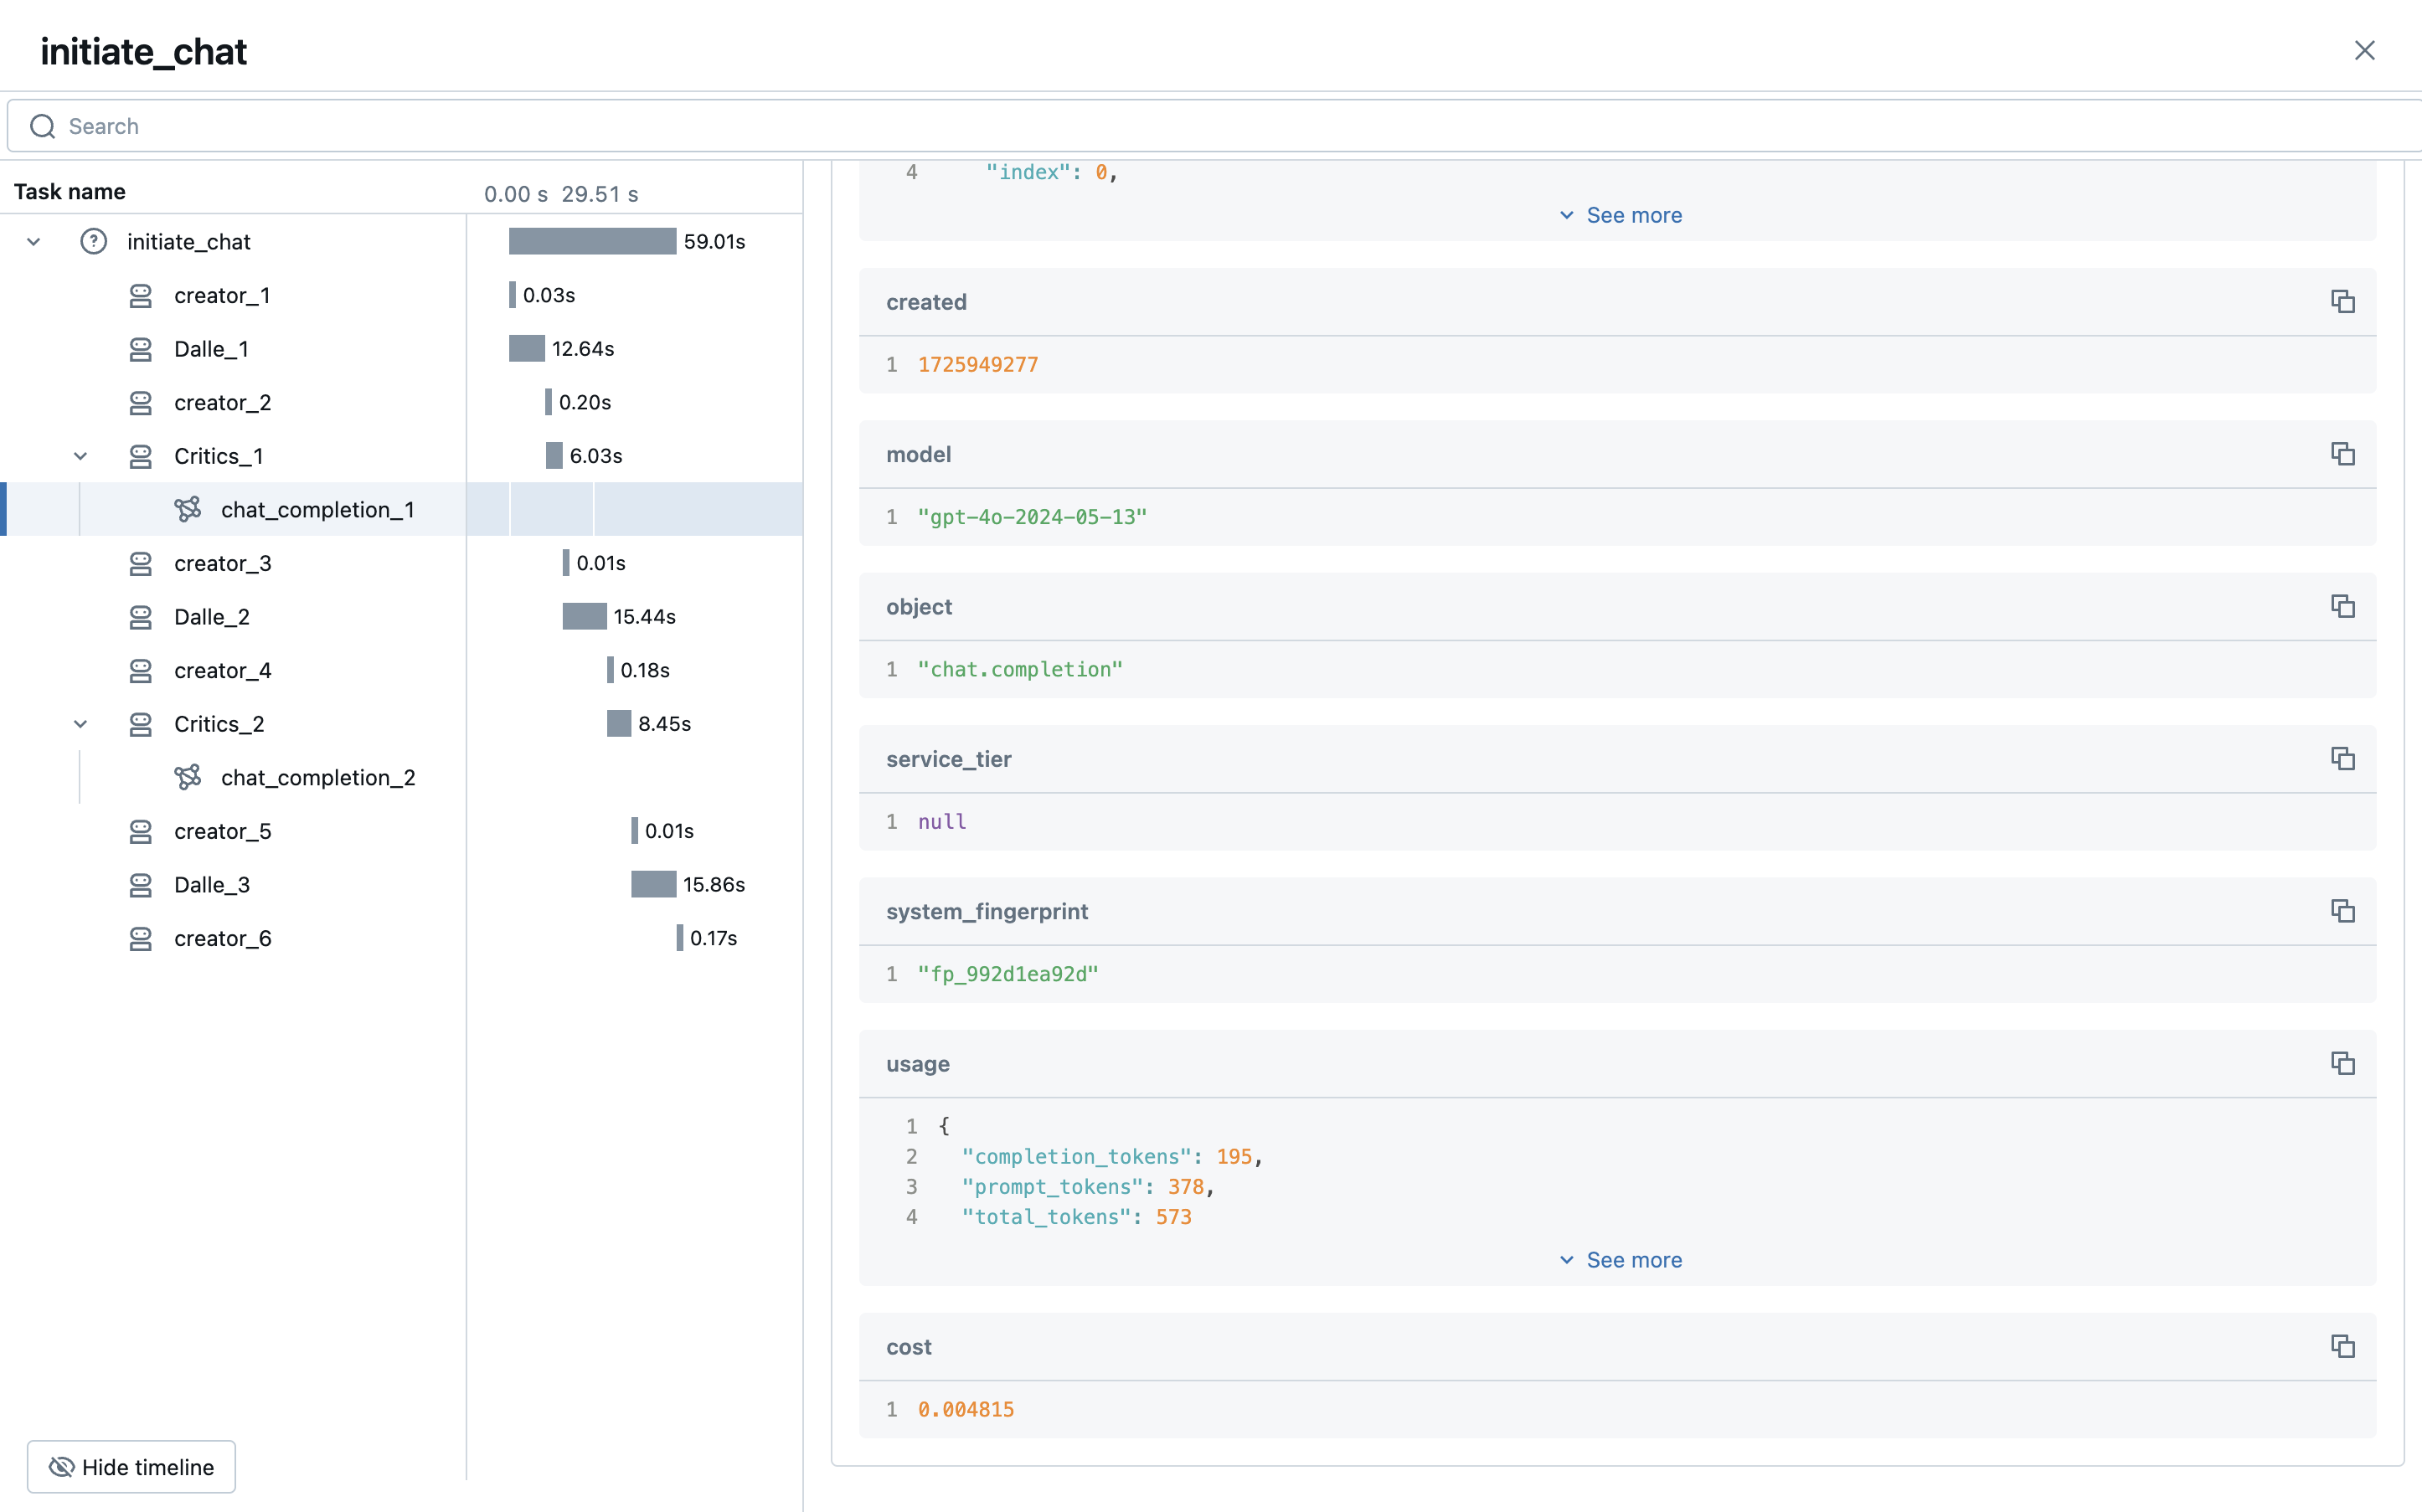
通过点击该跟踪 ID,我们可以看到详细的执行计划。底部,我们可以看到我们的提示 “矩阵与猫”,它启动了聊天会话。从那里,许多代理进行了交互,创建图像并提供反馈来“猫化”它们。另外,请注意跟踪 ID 与上面 mlflow.get_last_active_trace() 返回的跟踪 ID 相同。
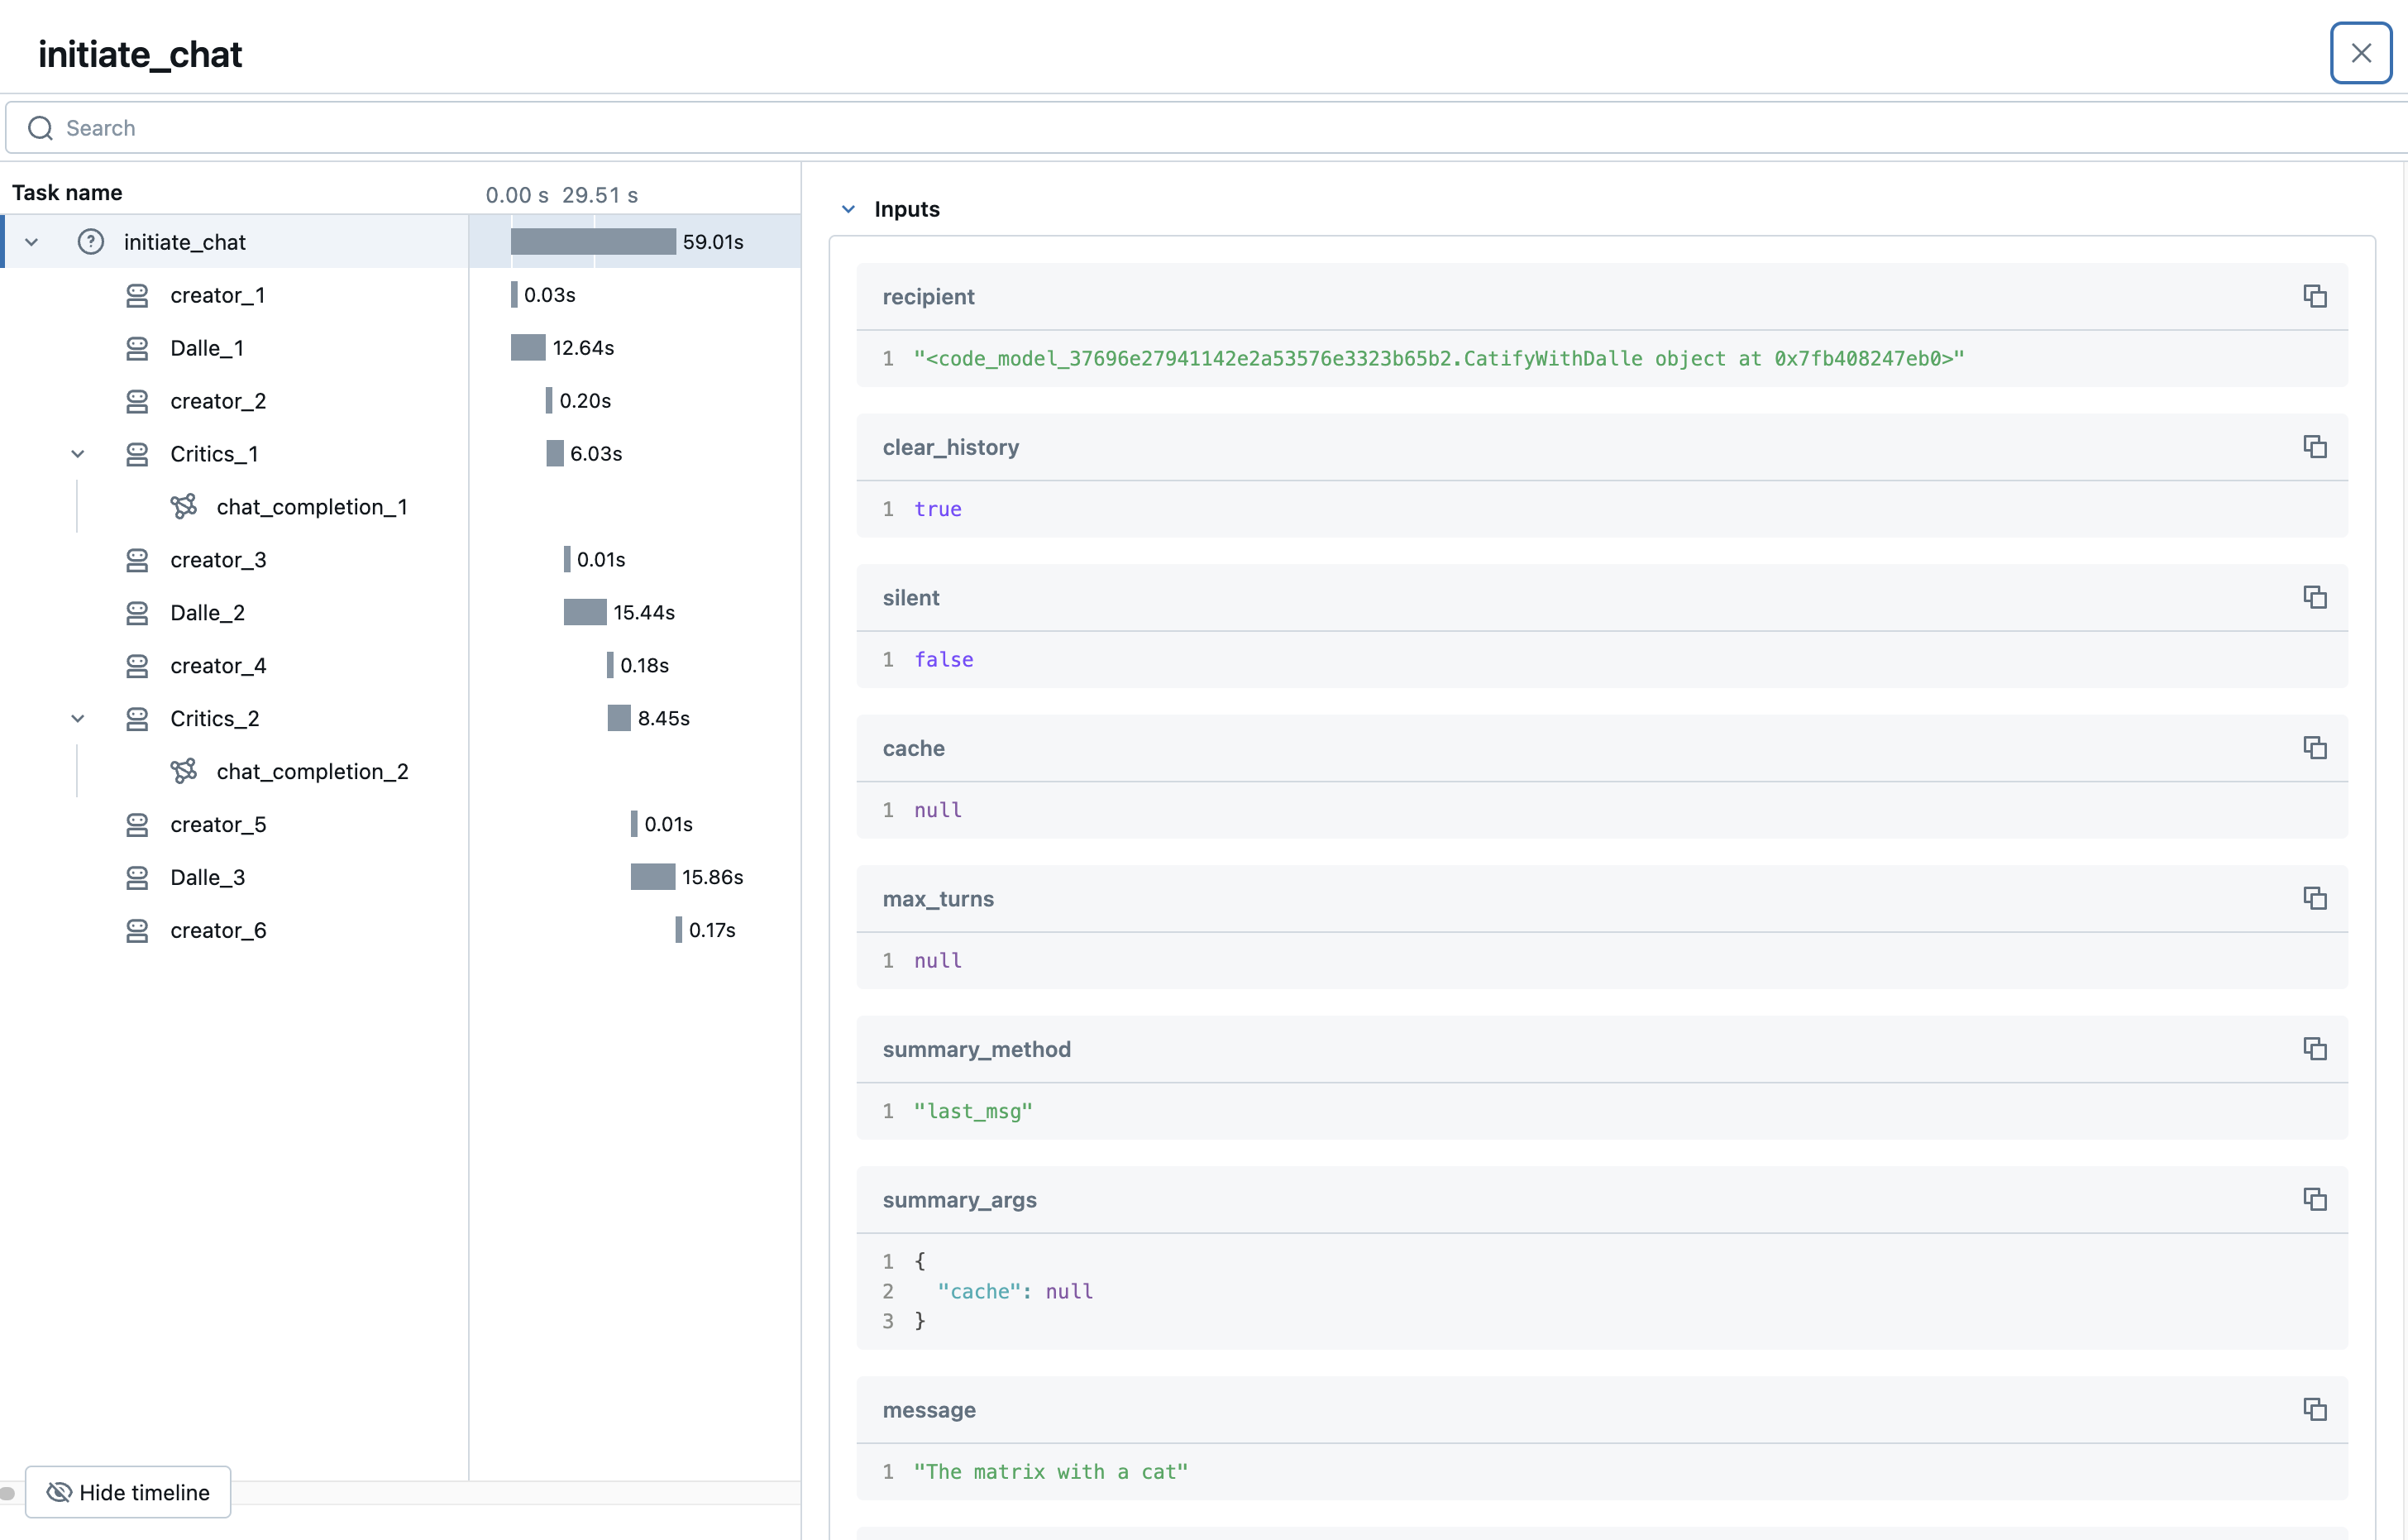
最后,让我们更深入地研究一下跟踪的 LLM 调用。正如您所见,我们有很多关于执行的宝贵信息,例如模型和使用统计信息。跟踪不仅有助于监控性能,还有助于监控成本、使用模式等等!您还可以利用自定义元数据来获得更精细化的见解。
使用 MLflow 记录工件
跟踪的主要目的是为复杂的代理执行提供健壮的轻量级摘要。对于更大或自定义的有效负载,MLflow 提供了各种工件记录 API,可以将图像、文本、表格等存储在 MLflow 跟踪服务器中。让我们通过记录提示及其关联的图像来快速演示此功能。
在我们的 CatifyWithDalle 类中,我们将进行 4 项修改...
- 在类的
__init__中创建一个实例变量来保存对象的元数据。 - 创建一个私有实用程序来增量更新我们的元数据,并使用 mlflow.log_image 记录图像。
- 在生成新图像后调用上述实用程序。
- 最后,使用 mlflow.log_dict 将我们的元数据对象记录为 JSON。
import uuid  # Add to generate artifact file names and indeces for prompt mapping to generated images

class CatifyWithDalle(AssistantAgent):
    def __init__(self, n_iters=2, **kwargs):
        """
        Initializes a CatifyWithDalle instance.

        This agent facilitates the creation of visualizations through a collaborative effort among
        its child agents: dalle and critics.

        Parameters:
            - n_iters (int, optional): The number of "improvement" iterations to run. Defaults to 2.
            - **kwargs: keyword arguments for the parent AssistantAgent.
        """
        super().__init__(**kwargs)
        self.register_reply([Agent, None], reply_func=CatifyWithDalle._reply_user, position=0)
        self._n_iters = n_iters
        self.dict_to_log = {}  # Add a buffer for storing mapping information

    # Adding this method to log the generated images and the prompt-to-image mapping file
    def _log_image_and_append_to_dict(self, img: Image, img_prompt: str, image_index: int)-> None:
        """ Method for logging generated images to MLflow and building a prompt mapping file """
        # Generate a unique ID
        _id = str(uuid.uuid1())

        # Append to class variable to log once at the end of all inference
        self.dict_to_log[_id] = {"prompt": img_prompt, "index": image_index}

        # Log image to MLflow tracking server
        mlflow.log_image(img, f"{_id}.png")

    def _reply_user(self, messages=None, sender=None, config=None):
        if all((messages is None, sender is None)):
            error_msg = f"Either {messages=} or {sender=} must be provided."
            raise AssertionError(error_msg)

        if messages is None:
            messages = self._oai_messages[sender]

        img_prompt = messages[-1]["content"]

        ## Define the agents
        self.critics = MultimodalConversableAgent(
            name="Critics",
            system_message=f"""You need to improve the prompt of the figures you saw.
{CRITIC_PROMPT}
Reply with the following format:

CRITICS: the image needs to improve...
PROMPT: here is the updated prompt!

""",
            llm_config={"max_tokens": 1000, "model": "gpt-4o"},
            human_input_mode="NEVER",
            max_consecutive_auto_reply=3,
        )

        self.dalle = DALLEAgent(
            name="Dalle", llm_config={"model": "dalle"}, max_consecutive_auto_reply=0
        )

        # Data flow begins
        self.send(message=img_prompt, recipient=self.dalle, request_reply=True)
        img = extract_img(self.dalle)
        plt.imshow(img)
        plt.axis("off")  # Turn off axis numbers
        plt.show()
        print("Image PLOTTED")

        self._log_image_and_append_to_dict(img, img_prompt, -1)  # Add image logging and buffer updates

        for i in range(self._n_iters):
            # Downsample the image s.t. GPT-4V can take
            img = extract_img(self.dalle)
            smaller_image = img.resize((128, 128), Image.Resampling.LANCZOS)
            smaller_image.save("result.png")

            self.msg_to_critics = f"""Here is the prompt: {img_prompt}.
            Here is the figure <img result.png>.
            Now, critic and create a prompt so that DALLE can give me a better image.
            Show me both "CRITICS" and "PROMPT"!
            """
            self.send(message=self.msg_to_critics, recipient=self.critics, request_reply=True)
            feedback = self._oai_messages[self.critics][-1]["content"]
            img_prompt = re.findall("PROMPT: (.*)", feedback)[0]

            self.send(message=img_prompt, recipient=self.dalle, request_reply=True)
            img = extract_img(self.dalle)
            plt.imshow(img)
            plt.axis("off")  # Turn off axis numbers
            plt.show()
            print(f"Image {i} PLOTTED")
            self._log_image_and_append_to_dict(img, img_prompt, i)  # Log the image in the iteration


        mlflow.log_dict(self.dict_to_log, "image_lookup.json")  # Log the prompt-to-image mapping buffer
        return True, "result.jpg"
现在,如果我们重新运行上面的模型记录代码,每次加载我们模型的最新版本时,我们的代理生成的图像将被记录下来,并且一个包含所有提示、提示索引和图像名称(用于查找目的)的 JSON 对象将被记录下来。
让我们演示一下,并将推理包装在一个 MLflow 运行中以方便聚合。另外请注意,我们将利用 Autogen 的 缓存功能,因此鉴于我们已经使用此提示进行了推理,我们将不再实际进行 LLM 调用;我们只是从缓存中读取并使用我们新的 MLflow 代码进行记录。
# Be sure to re-log the model by rerunning the above code
with mlflow.start_run(run_name="log_image_during_inferfence"):
    loaded = mlflow.pyfunc.load_model(f"runs:/{run_id}/autogen_pyfunc")
    loaded.predict("The matrix with a cat")
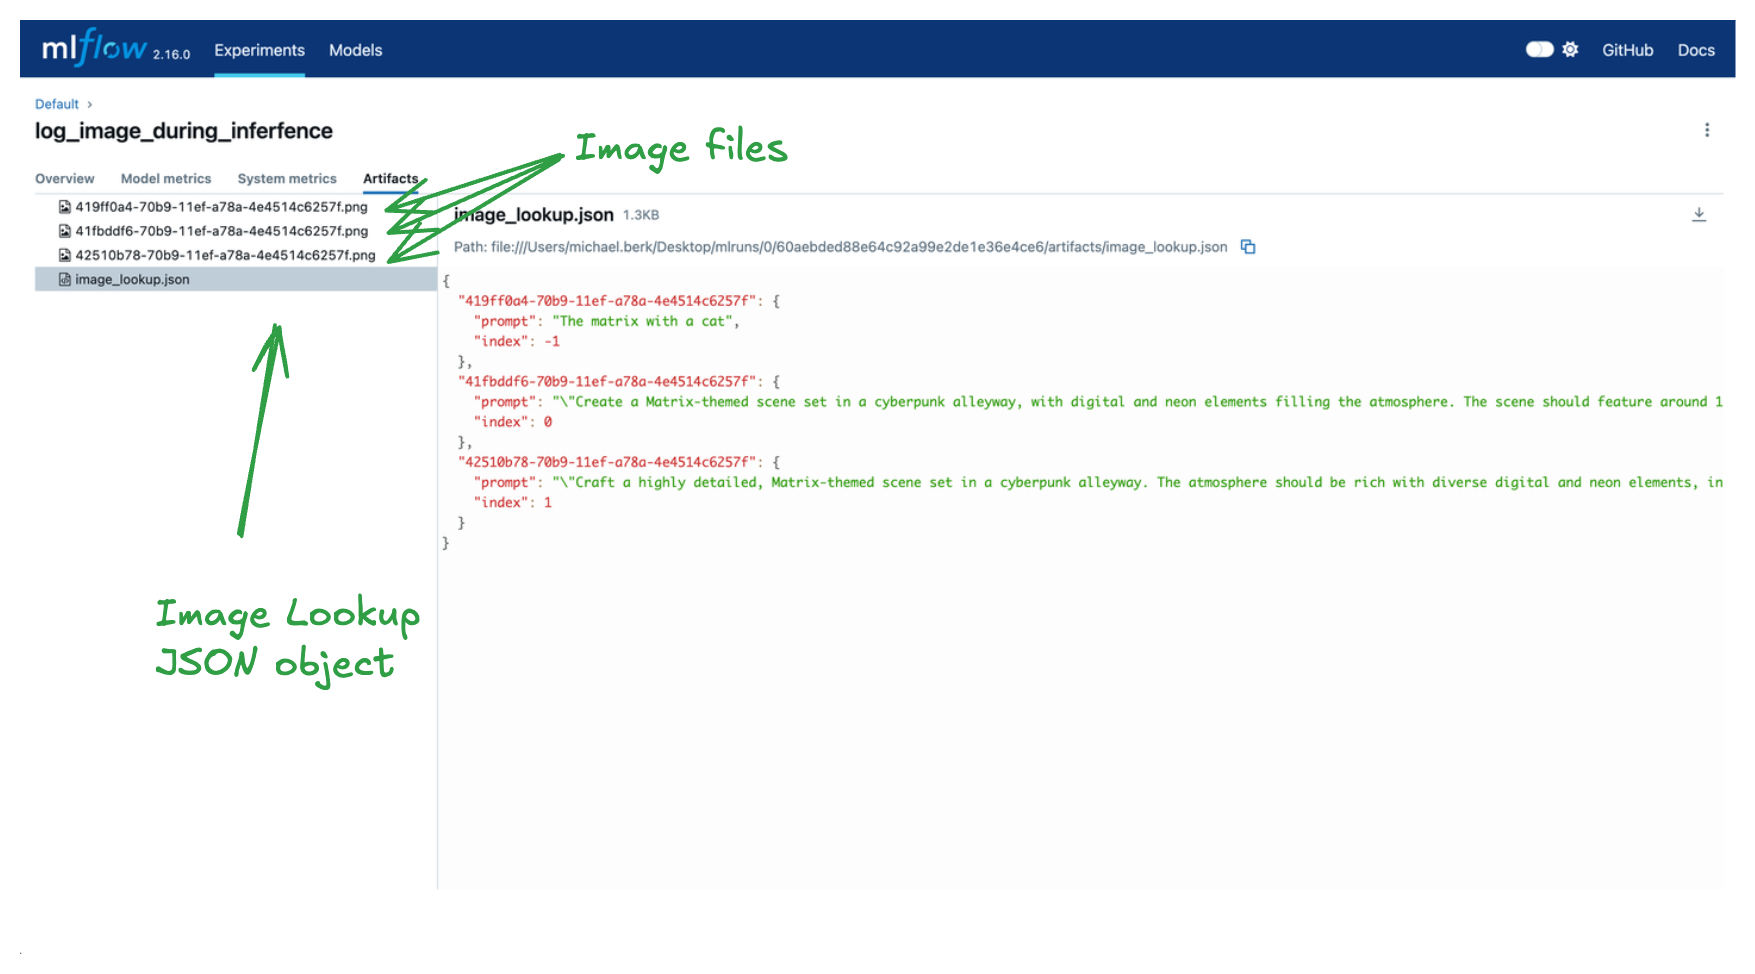
正如您所见,我们已经记录了三个感兴趣的图像和一个查找字典。字典的键对应于图像名称,值对应于有关图像如何生成的附加信息。通过这些工件,我们可以对提示质量进行详细分析,并对我们的“猫化”代理进行迭代改进!
MLflow 的其他好处
幕后还有很多事情超出了本教程的范围,但这里有一个关于构建代理框架时有用的其他 MLflow 功能的简短列表。
- 依赖项管理:当您记录模型时,MLflow 会自动尝试推断您的 pip 要求。这些要求以多种格式编写,使得远程服务您的模型更加简单。如果您有本地依赖项,如上所述,您可以在记录模型时通过
code_paths参数指定 MLflow 要序列化的其他路径。 - 模型别名:在迭代构建代理框架时,您需要一种方便的方式来比较模型。MLflow 模型 别名和标签有助于查找 MLflow 模型注册表,并允许您轻松加载和部署特定的模型版本。
- 嵌套运行:对于代理框架,尤其是当训练底层 LLM 组件时,您通常会有复杂的嵌套结构。MLflow 支持 嵌套运行以方便聚合您的运行信息。这在 LLM 训练和微调时可能特别有用。
总结
在本篇博文中,我们概述了如何使用 AutoGen 创建一个复杂的代理。我们还展示了如何利用 MLflow 的 来自代码的模型功能来记录和加载我们的模型。最后,我们利用 MLflow AutoGen 的自动记录功能来自动利用 MLflow 跟踪,以获取细粒度且线程安全的代理执行信息。
祝您编码愉快!